很好的一个DIY,不敢独享,特分享给大家!
一、硬件:
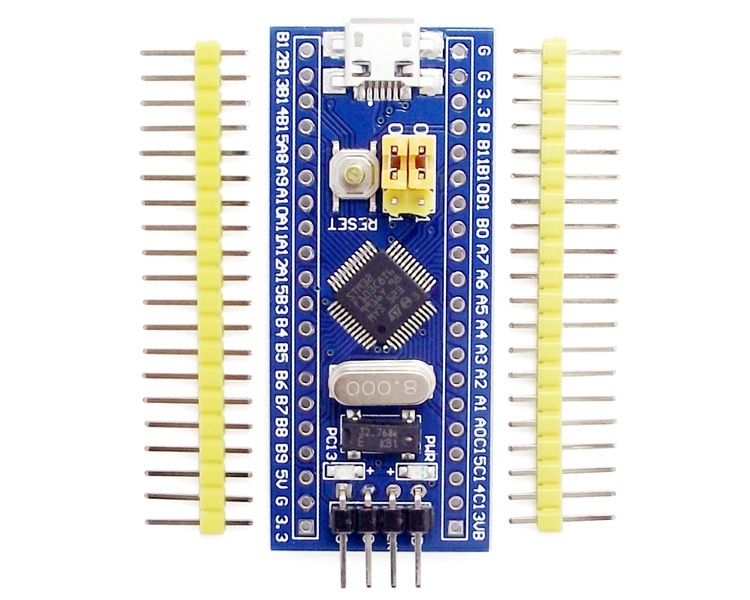
某宝搜索“stm32f103c8t6最小系统板”,实物如下图所示:
二、软件:
2.1、从arduino官网https://www.arduino.cc下载Arduino IDE,我下载的是zip免安装版本,文件名:arduino-1.8.7-windows.zip;
2.2、从https://github.com/rogerclarkmelbourne/Arduino_STM32下载stm32的arduino硬件库,文件名:Arduino_STM32-master.zip;
2.3、从https://github.com/rogerclarkmelbourne/STM32duino-bootloader下载bootloader文件,文件名:STM32duino-bootloader-master.zip;
2.4、从https://developer.arm.com/open-source/gnu-toolchain/gnu-rm下载GNU Arm Embedded Toolchain,文件名:gcc-arm-none-eabi-7-2018-q2-update-win32.zip
2.5、解压以上四个压缩包;
2.6、把Arduino_STM32-master文件夹改名为Arduino_STM32并移动到arduino-1.8.7\hardware目录下;
2.7、把gcc-arm-none-eabi-7-2018-q2-update-win32移动到arduino-1.8.7\hardware\Arduino_STM32\tools目录下;
2.8、在arduino-1.8.7\hardware\Arduino_STM32\STM32F1\platform.txt中添加目录定义,如下两行:
runtime.hardware.path=./hardware/Arduino_STM32
runtime.tools.arm-none-eabi-gcc.path=./hardware/Arduino_STM32/tools/gcc-arm-none-eabi-7-2018-q2-update-win32
2.9、把arduino-1.8.7\hardware\Arduino_STM32\tools\gcc-arm-none-eabi-7-2018-q2-update-win32\arm-none-eabi\include\sys\cdefs.h中的宏定义__always_inline改为:
//#define __always_inline __inline__ __attribute__((__always_inline__))
#define __always_inline __attribute__((__always_inline__))
2.10、运行arduino-1.8.7\hardware\Arduino_STM32\drivers\win\install_drivers.bat安装驱动,驱动包括Maple DFU driver和Maple Serial driver,
其中Maple DFU driver用于更新程序,Maple Serial driver用于USB转串口。
三、操作:
3.1、使用串口或仿真器stlink烧录"STM32duino-bootloader-master.zip\STM32duino-bootloader-master\bootloader_only_binaries\generic_boot20_pc13.bin"文件到stm32f103c8t6最小系统板;
3.2、使用usb数据线直接连接stm32f103c8t6最小系统板的Micro USB接口,根据提示安装驱动;
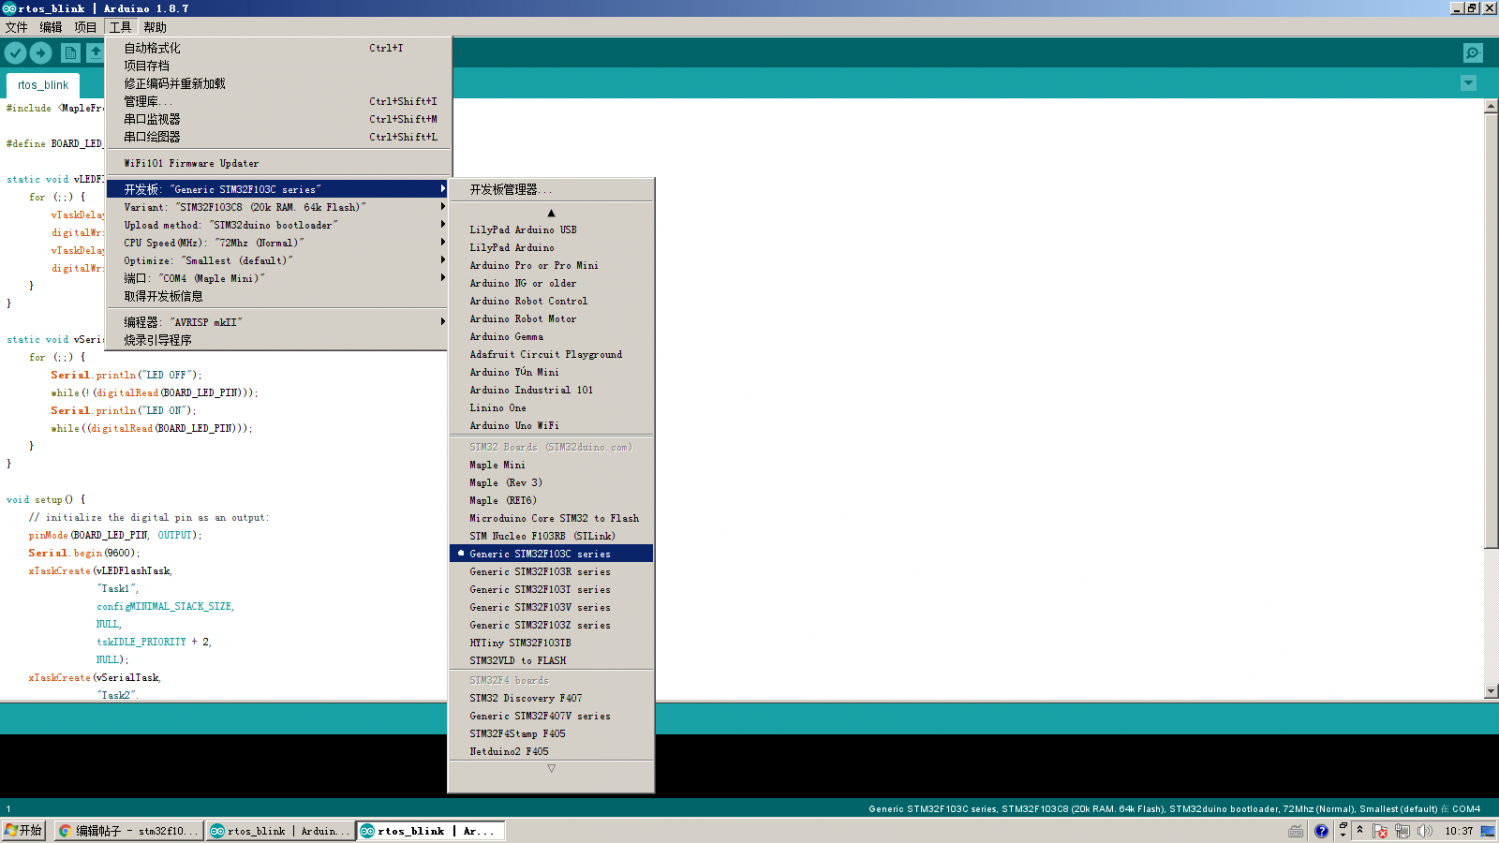
3.3、运行arduino ide,文件\新建,并设置开发板,如下图所示:
3.4、添加程序:
#include <MapleFreeRTOS900.h>
#define BOARD_LED_PIN PC13
static void vLEDFlashTask(void *pvParameters) {
for (;;) {
vTaskDelay(500);
digitalWrite(BOARD_LED_PIN, HIGH);
vTaskDelay(500);
digitalWrite(BOARD_LED_PIN, LOW);
}
}
static void vSerialTask(void *pvParameters) {
for (;;) {
Serial.println("LED OFF");
while(!(digitalRead(BOARD_LED_PIN)));
Serial.println("LED ON");
while((digitalRead(BOARD_LED_PIN)));
}
}
void setup() {
// initialize the digital pin as an output:
pinMode(BOARD_LED_PIN, OUTPUT);
Serial.begin(9600);
xTaskCreate(vLEDFlashTask,
"Task1",
configMINIMAL_STACK_SIZE,
NULL,
tskIDLE_PRIORITY + 2,
NULL);
xTaskCreate(vSerialTask,
"Task2",
configMINIMAL_STACK_SIZE,
NULL,
tskIDLE_PRIORITY + 2,
NULL);
vTaskStartScheduler();
}
void loop() {
// Insert background code here
}
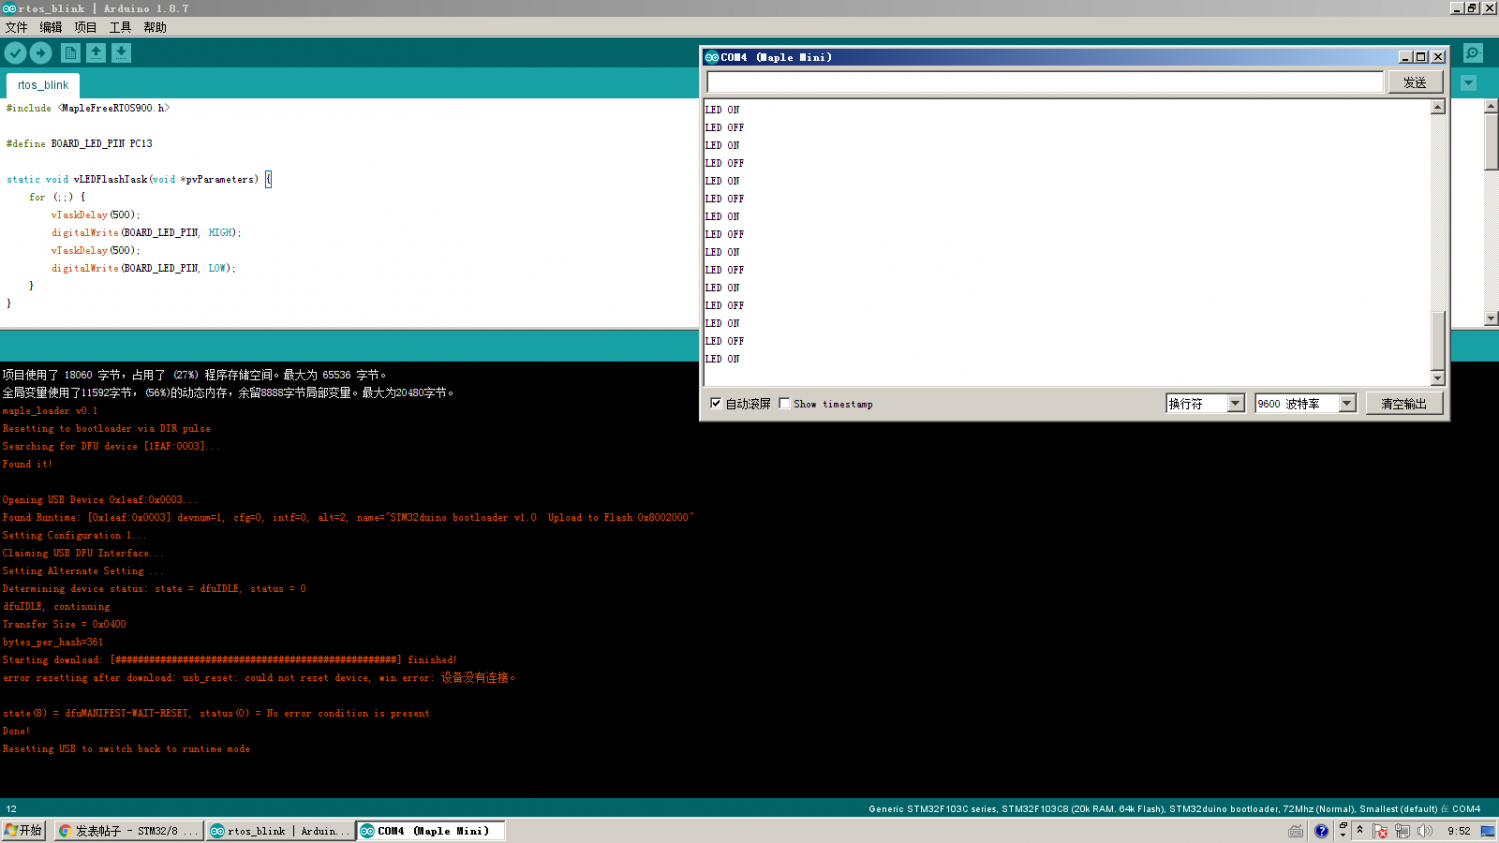
3.5、验证/编译并上传,运行效果如下:


 我要赚赏金
我要赚赏金

