
还是按照之前的顺序,先大体介绍一下。以下资料来自于官网。
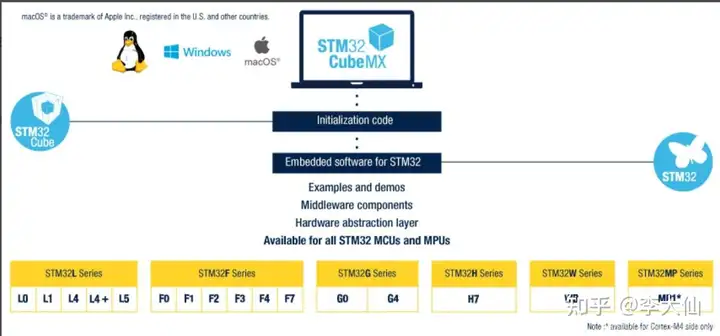
STM32CubeMX is a graphical tool that allows a very easy configuration of STM32 microcontrollers and microprocessors, as well as the generation of the corresponding initialization C code for the Arm® Cortex®-M core or a partial Linux® Device Tree for Arm® Cortex®-A core), through a step-by-step process. . The first step consists in selecting the STMicroelectronics STM32 microcontroller or microprocessor that matches the required set of peripherals. . For microprocessors, the second step allows to configure the GPIOs and the clock setup for the whole system, and to interactively assign peripherals either to the Arm® Cortex®-M or to the Cortex®A world. Specific utilities, such as DDR configuration and tuning, make it easy to get started with STM32 microprocessors. For Cortex®-M core, the configuration includes additional steps that are exactly similar to those described for microcontrollers. . For microcontrollers and microprocessor Arm® Cortex®-M, the second step consists in configuring each required embedded software thanks to a pinout-conflict solver, a clock-tree setting helper, a power-consumption calculator, and an utility that configures the peripherals (such as GPIO or USART) and the middleware stacks (such as USB or TCP/IP). . Eventually the user launches the generation that matches the selected configuration choices. This step provides the initialization C code for the Arm® Cortex®-M, ready to be used within several development environments, or a partial Linux® device tree for the Arm® Cortex®-A. STM32CubeMX is delivered within STM32Cube.
KEY FEATURES - Intuitive STM32 microcontroller and microprocessor selection - Rich easy-to-use graphical user interface allowing the configuration of: - Pinout with automatic conflict resolution - Peripherals and middleware functional modes with dynamic validation of parameter constraints for Arm® Cortex®-M core - Clock tree with dynamic validation of the configuration - Power sequence with estimated consumption results - Generation of initialization C code project, compliant with IAR™, Keil® and GCC compilers, for Arm® Cortex®-M core - Generation of a partial Linux® Device Tree for Arm® Cortex®-A core (STM32 microprocessors) - Availability as standalone software running on Windows®, Linux® and macOS® (macOS is a trademark of Apple Inc. registered in the U.S. and other countries.) operating systems, or through Eclipse plug-in
翻译一下
STM32CubeMX是一种图形化工具,可以非常轻松地配置STM32微控制器和微处理器,并可以通过逐步的过程为Arm ®Cortex®-M内核或Arm ® Cortex ®A的Linux®设备树生成相应的初始化C代码。 . 第一步是选择与所需外围设备相匹配的STMicroelectronics STM32微控制器或微处理器。 . 对于微处理器,第二步允许配置整个系统的GPIO和时钟设置,并以交互方式将外围设备分配给Arm®Cortex®-M或Cortex®A。特定的应用程序,例如DDR配置和调整,使STM32微处理器的入门变得容易。对于Cortex®-M内核,该配置包括与为微控制器描述的步骤完全相似的其他步骤。 . 对于微控制器和微处理器Arm®Cortex®-M,第二步在于配置每个必需的嵌入式软件,这要感谢引脚冲突解决器,时钟树设置帮助器,功耗计算器以及用于配置外围设备的实用程序(例如GPIO或USART)和中间件堆栈(例如USB或TCP / IP)。
最终,用户启动了与所选配置选项匹配的生成。此步骤提供了可在多个开发环境中使用的Arm®Cortex®-M的初始化C代码,或Arm®Cortex®-A的部分Linux®设备树。
主要特点 -直观的STM32微控制器和微处理器选择 -丰富易用的图形用户界面,可配置: -具有自动解决冲突的引脚排列 -具有Arm®Cortex®-M内核参数约束的动态验证的外围设备和中间件功能模式 -具有动态验证配置的时钟树 -带有估计功耗结果的电源序列 -生成适用于Arm®Cortex®-M内核的,符合IAR™,Keil®和GCC编译器的初始化C代码项目 -生成用于Arm®Cortex®-A内核的部分Linux®设备树(STM32微处理器) -可作为独立软件在Windows®,Linux®和macOS®(macOS是Apple Inc.在美国和其他国家/地区注册的商标)上运行,或者通过Eclipse插件运行。2. 界面
因为是第一次使用,也就不配置太过于复杂的工程了,配置一个简单的用以演示。
后续教程可以参考: 微雪课堂 STM32CUBEMX实战
都说单片机入门是点灯,确实,点灯就相当于编程语言的Hello World一样。学会花式点灯是学习单片机的基础。
下面开始分步讲解
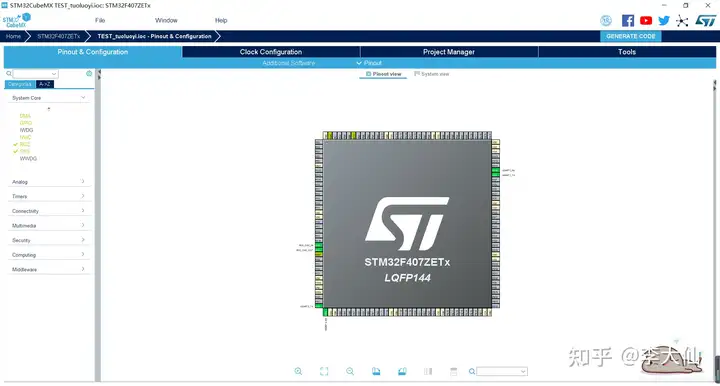
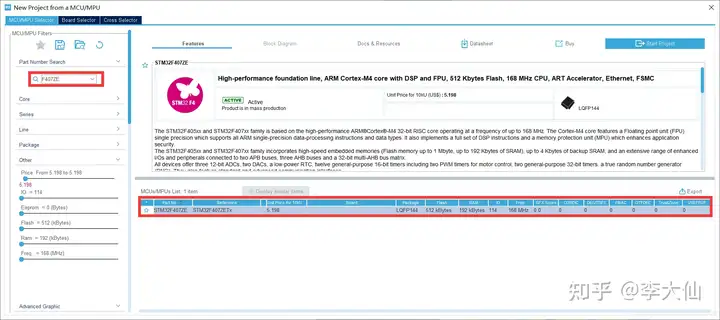
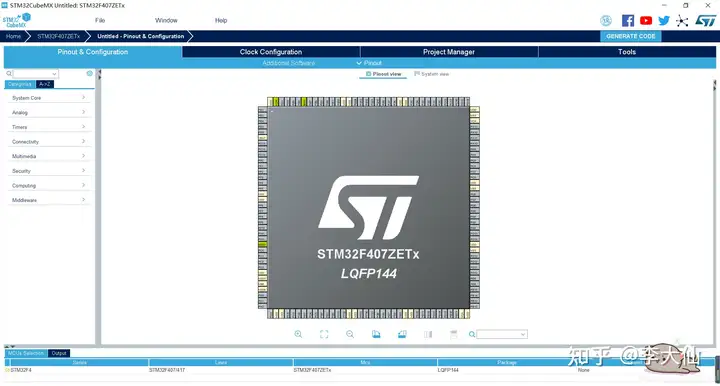
3.1 选择芯片型号我这里用的是正点原子的探索者F407ZET6开发板
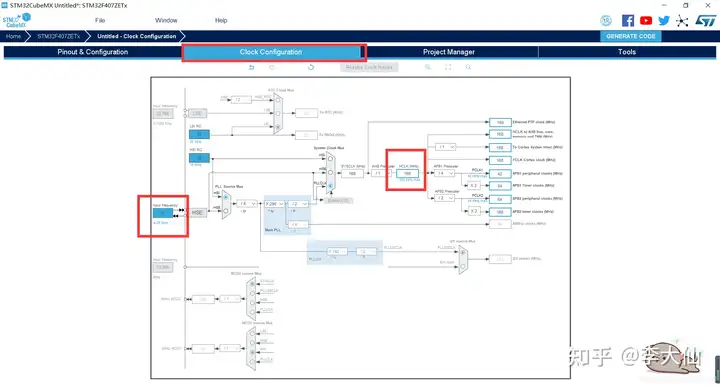
首先将HSE选择晶振,晶振的频率更加准确
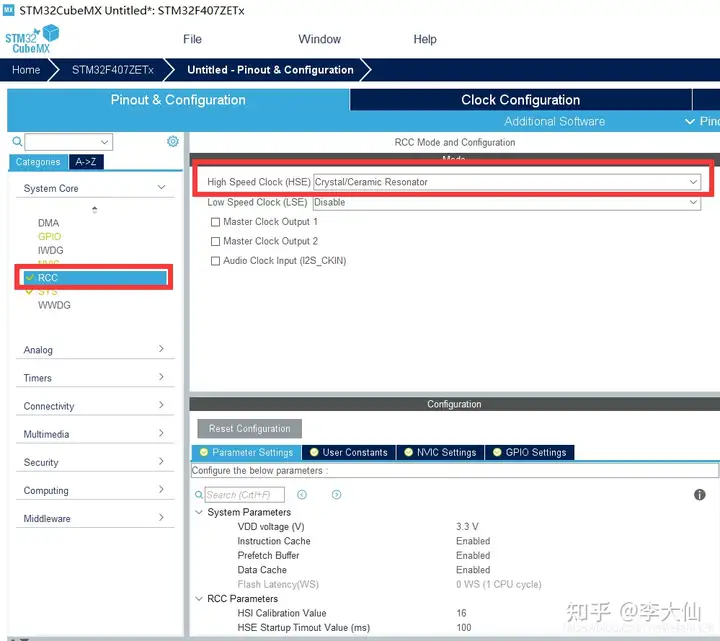
然后配置内部的频率,晶振是8M,主频开到最大168M
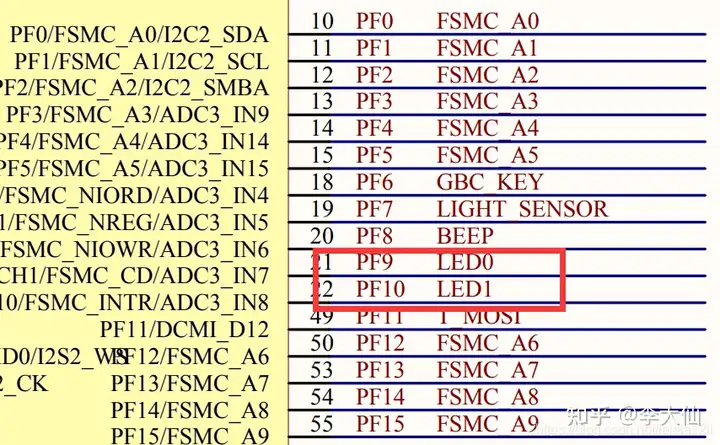
查阅原理图可知,LED的引脚是PF9和PF10,且在低电平是,LED导通,发亮

在CUBEMX上找到,并配置为输出模式
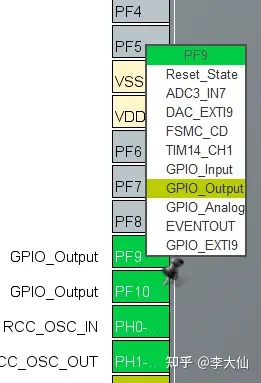
这样就配置好了。
3.4 配置工程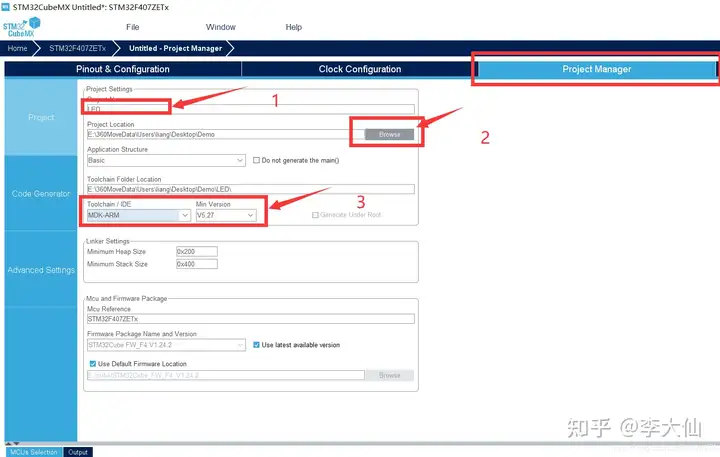
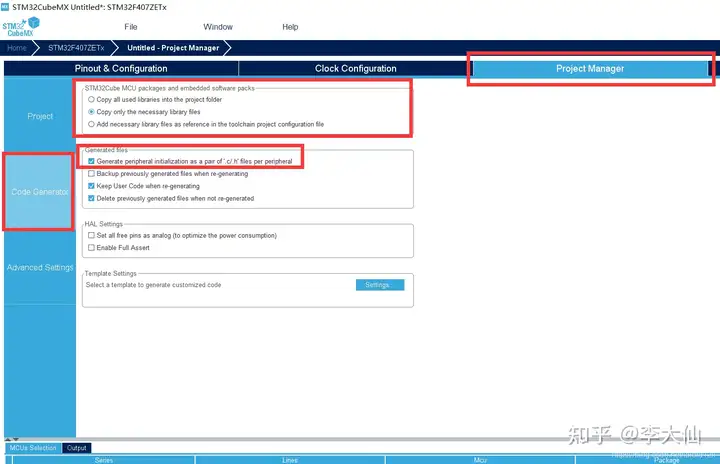
最后,点击GENERATE CODE 即可生成

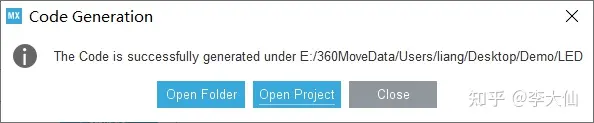
成功的界面。注意工程的目录不能包含中文,否则会生成失败
到此,LED的初始化配置就完成了,接下来,对于LED的操作,就需要我们自己动手添加函数了。
3.5 添加LED相关函数首先,关于输出引脚相关的函数,在KEIL编程时,其实是会有语法提示的,从英文名上,我们基本上就知道这个函数是干啥的了。
我们操作LED的状态,本质上就是改变GPIO的状态,所以,我们主要用 HAL_GPIO_TogglePin();//翻转GPIO HAL_GPIO_WritePin();//写GPIO 这两个函数
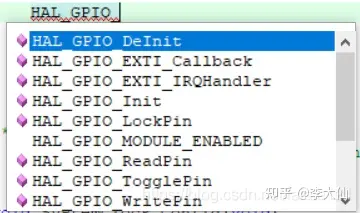

鼠标靠近函数名时,便会自动提示函数参数
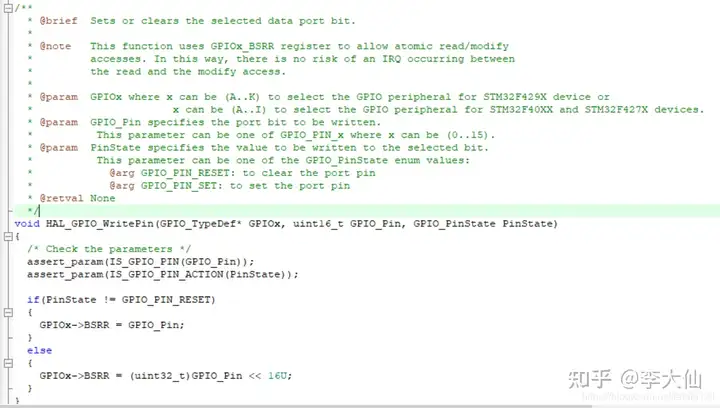
在追踪到函数本身的时候,上面的注释会更详细
根据这些,再加上一个延时函数,就可以写出一个流水灯了,代码如下
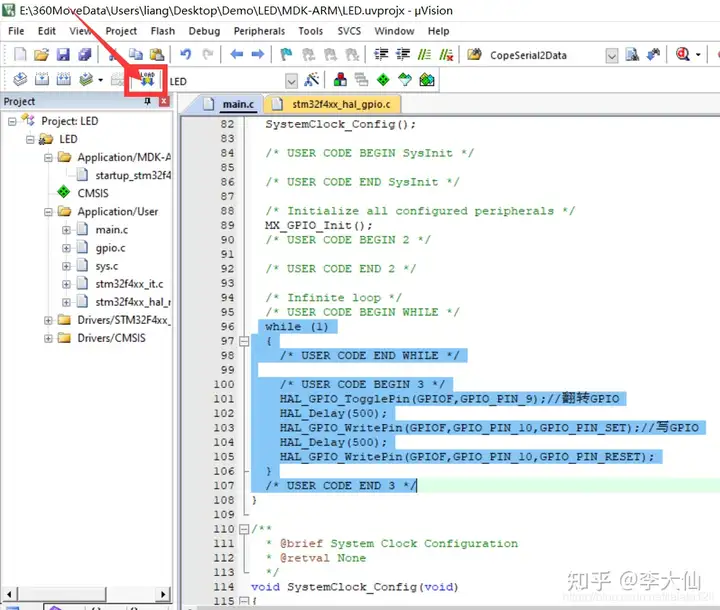
while (1)
  {
    /* USER CODE END WHILE */
    /* USER CODE BEGIN 3 */
        HAL_GPIO_TogglePin(GPIOF,GPIO_PIN_9);//翻转GPIOF9        HAL_Delay(500);
        HAL_GPIO_WritePin(GPIOF,GPIO_PIN_10,GPIO_PIN_SET);//写GPIOF10        HAL_Delay(500);
        HAL_GPIO_WritePin(GPIOF,GPIO_PIN_10,GPIO_PIN_RESET);
  }
  /* USER CODE END 3 */
3.6 编译 下载编译不报错,就可以连接开发板、STLINK(JLINK)点击下载,即可。
这样,点灯的操作就完成了。单片机入门完成。
来源:网络版权归原作者所有,如有侵权,请联系删除。
 我要赚赏金
我要赚赏金 STM32
STM32 MCU
MCU 通讯及无线技术
 物联网技术
物联网技术 电子DIY
电子DIY 板卡试用
板卡试用 基础知识
基础知识 软件与操作系统
 我爱生活
我爱生活 小e食堂
小e食堂

