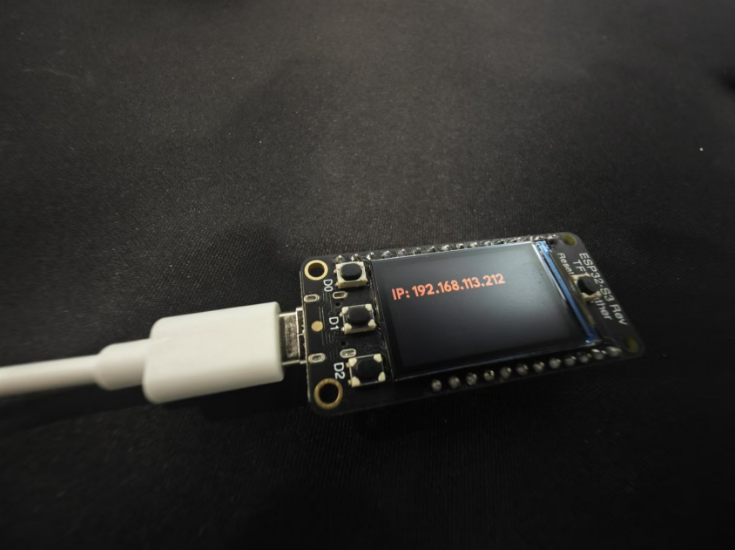
[Let'sDo第3期] DIY一个电子测光表 3 过程贴(wifi联网)

一、联网状态测试:
import board
import wifi
import displayio
from adafruit_bitmap_font import bitmap_font
from adafruit_display_text import label
from digitalio import DigitalInOut, Direction, Pull
import time

# WiFi network information
ssid = 'xiaogui'
password = '88888888'

# Load font
font = bitmap_font.load_font("LeagueSpartan-Bold-16.bdf")
color_FireBrick = 0xB22222  # 耐火砖红

# Initialize display parameters
display = board.DISPLAY
display.brightness = 0.75  # Change brightness
display.rotation = 0  # Change orientation, 0 for landscape, 90 for portrait

# Button control
button = DigitalInOut(board.D1)
button.direction = Direction.INPUT
button.pull = Pull.UP

# Create a group to hold the text elements
text_group = displayio.Group()

# Function to display IP address on the screen
def display_ip_address(ip_address):
    # Remove existing text if any
    for i in reversed(range(len(text_group))):
        displayio.remove(text_group[i])

    # Create a new label for the IP address
    ip_text = label.Label(
        font=font,
        text=f"\n IP: {ip_address}",
        x=2,
        y=2,
        color=color_FireBrick,
    )
    text_group.append(ip_text)

# Connect to WiFi
print("Connecting to WiFi...")
wifi.radio.connect(ssid, password)

# Wait for the connection to be established
max_attempts = 10
attempt = 0
while not wifi.radio.ipv4_address and attempt < max_attempts:
    print("Waiting for connection...")
    time.sleep(1)
    attempt += 1

if wifi.radio.ipv4_address:
    print("Connected to WiFi")
    print(f"IP address: {wifi.radio.ipv4_address}")
    display_ip_address(wifi.radio.ipv4_address)  # Display IP address on the screen
else:
    print("Failed to connect to WiFi")

# Set the text group as the root group to display the text
display.root_group = text_group
(观看视频点击图片)
联网控制测试:
1.控制端(html):
<!DOCTYPE html>
<html>
<head>
    <meta charset="UTF-8">
    <meta name="viewport" content="width=device-width, initial-scale=1.0">
    <title>ESP32 LED Control</title>
    <style>
        body {
            font-family: system-ui, -apple-system, sans-serif;
            margin: 0;
            min-height: 100vh;
            display: flex;
            justify-content: center;
            align-items: center;
            background: linear-gradient(135deg, #f5f7fa 0%, #c3cfe2 100%);
        }
        .container {
            background: rgba(255, 255, 255, 0.9);
            padding: 2rem;
            border-radius: 1rem;
            box-shadow: 0 8px 32px rgba(31, 38, 135, 0.1);
            text-align: center;
            min-width: 300px;
        }
        h1 {
            color: #2d3748;
            margin-bottom: 2rem;
        }
        .led-display {
            margin: 2rem 0;
        }
        .led-indicator {
            width: 50px;
            height: 50px;
            border-radius: 50%;
            margin: 0 auto 1rem;
            background: #cbd5e0;
            transition: all 0.3s ease;
        }
        .led-indicator.on {
            background: #48bb78;
            box-shadow: 0 0 20px #48bb78;
        }
        .button-container {
            display: flex;
            gap: 1rem;
            justify-content: center;
            margin: 2rem 0;
        }
        .control-button {
            background: #4299e1;
            color: white;
            border: none;
            padding: 1rem 2rem;
            border-radius: 0.5rem;
            font-size: 1rem;
            cursor: pointer;
            transition: all 0.3s ease;
        }
        .control-button:hover {
            background: #3182ce;
            transform: translateY(-2px);
        }
        .control-button:active {
            transform: translateY(0);
        }
        .response {
            margin-top: 1rem;
            padding: 1rem;
            border-radius: 0.5rem;
            background: rgba(0, 0, 0, 0.05);
            font-family: monospace;
            color: #2d3748;
        }
        .error {
            color: #e53e3e;
        }
    </style>
</head>
<body>
    <div>
        <h1>ESP32 LED Control</h1>
        <div>
            <div id="led-indicator"></div>
            <div id="status-text">LED Status: Unknown</div>
        </div>
        <div>
            <button onclick="sendCommand('on')">Turn On</button>
            <button onclick="sendCommand('off')">Turn Off</button>
        </div>
        <div id="response"></div>
    </div>

    <script>
        const ESP32_IP = '192.168.113.212';
        const ledIndicator = document.getElementById('led-indicator');
        const statusText = document.getElementById('status-text');
        const response = document.getElementById('response');

        async function sendCommand(action) {
            try {
                const res = await fetch(`http://${ESP32_IP}/${action}`);
                const text = await res.text();

                response.textContent = text;
                response.classList.remove('error');

                ledIndicator.classList.toggle('on', action === 'on');
                statusText.textContent = `LED Status: ${action === 'on' ? 'On' : 'Off'}`;
            } catch (error) {
                response.textContent = `Error: Failed to communicate with ESP32 (${error.message})`;
                response.classList.add('error');
            }
        }
    </script>
</body>
</html>
2.接收端(cpy):
import board
import digitalio
import wifi
import socketpool
import time

# WiFi credentials
SSID = 'xiaogui'
PASSWORD = '88888888'

# LED setup
led = digitalio.DigitalInOut(board.LED)
led.direction = digitalio.Direction.OUTPUT

# Constants
BUFFER_SIZE = 512
MAX_RETRIES = 3
RETRY_DELAY = 0.1

print("Connecting to WiFi...")
wifi.radio.connect(SSID, PASSWORD)
print("Connected to WiFi")
print("IP Address:", wifi.radio.ipv4_address)

pool = socketpool.SocketPool(wifi.radio)

def handle_client_connection(conn, addr):
    """Handle a single client connection with retries"""
    for _ in range(MAX_RETRIES):
        try:
            request = bytearray(BUFFER_SIZE)
            request_length = conn.recv_into(request)
            if request_length == 0:
                return

            request_text = request[:request_length].decode()

            # Add CORS headers to allow requests from web browsers
            headers = [
                "HTTP/1.1 200 OK",
                "Access-Control-Allow-Origin: *",
                "Access-Control-Allow-Methods: GET",
                "Content-Type: text/plain",
            ]

            if "GET /on" in request_text:
                led.value = True
                response = "LED turned on"
            elif "GET /off" in request_text:
                led.value = False
                response = "LED turned off"
            else:
                response = "Invalid command"

            headers.append(f"Content-Length: {len(response)}")
            http_response = "\r\n".join(headers) + "\r\n\r\n" + response

            # Send response with retries
            for _ in range(MAX_RETRIES):
                try:
                    conn.send(http_response.encode())
                    return True
                except OSError as e:
                    if e.errno != 11:  # EAGAIN
                        raise
                    time.sleep(RETRY_DELAY)

            return False

        except OSError as e:
            if e.errno != 11:  # If not EAGAIN
                print(f"Error handling client: {e}")
                return False
            time.sleep(RETRY_DELAY)

    return False

def web_server():
    addr = wifi.radio.ipv4_address
    print(f"Starting web server at http://{addr}")

    with pool.socket() as s:
        s.bind((str(addr), 80))
        s.listen(1)

        while True:
            try:
                conn, addr = s.accept()
                print("Client connected from", addr)

                try:
                    success = handle_client_connection(conn, addr)
                    if not success:
                        print("Failed to handle client after retries")
                finally:
                    # Always close the connection
                    try:
                        conn.close()
                    except OSError:
                        pass

            except OSError as e:
                if e.errno == 11:  # EAGAIN
                    # Small delay before next accept
                    time.sleep(RETRY_DELAY)
                    continue
                print(f"Server error: {e}")
                continue

print("Starting web server...")
web_server()GIT其他示例资料:
Adafruit ESP32-S3 Reverse TFT Feather
https://learn.adafruit.com/esp32-s3-reverse-tft-feather/circuitpython-internet-test
Networking in CircuitPython
https://learn.adafruit.com/networking-in-circuitpython/ntp-time-example#
Adafruit_CircuitPython_NTP
https://github.com/adafruit/Adafruit_CircuitPython_NTP


 我要赚赏金
我要赚赏金

