
在将TFT彩屏点亮之前,人机交互还是得靠串口啦,那就先体验一下GD32的串口通信功能啦,当然啦,依然使用STM32的固件库来完成代码。完成的目标是实现串口的发送与接收功能。并通过接收到的信息简单的控制一下LED灯的亮灭。
串口初始化,接收数据在中断里接收
void  UartInit()
{
		GPIO_InitTypeDef   GPIO_InitStruct;
    USART_InitTypeDef  USART_InitStruct;
    NVIC_InitTypeDef   NVIC_InitStruct;
	  RCC_APB2PeriphClockCmd (RCC_APB2Periph_GPIOA,ENABLE );
	  GPIO_InitStruct.GPIO_Mode = GPIO_Mode_AF_PP;
	  GPIO_InitStruct.GPIO_Pin = GPIO_Pin_2| GPIO_Pin_9;
	  GPIO_InitStruct.GPIO_Speed = GPIO_Speed_50MHz ;
    GPIO_Init (GPIOA,&GPIO_InitStruct);
	  GPIO_InitStruct.GPIO_Mode = GPIO_Mode_IN_FLOATING;
	  GPIO_InitStruct.GPIO_Pin = GPIO_Pin_3| GPIO_Pin_10;
	  GPIO_Init (GPIOA,&GPIO_InitStruct);
	  RCC_APB2PeriphClockCmd (RCC_APB2Periph_USART1,ENABLE);
	  RCC_APB1PeriphClockCmd (RCC_APB1Periph_USART2,ENABLE);

	  USART_InitStruct.USART_BaudRate = 9600;
	  USART_InitStruct.USART_HardwareFlowControl = USART_HardwareFlowControl_None;
	  USART_InitStruct.USART_Mode = USART_Mode_Rx | USART_Mode_Tx;
	  USART_InitStruct.USART_Parity = USART_Parity_No;
	  USART_InitStruct.USART_StopBits = USART_StopBits_1;
	  USART_InitStruct.USART_WordLength = USART_WordLength_8b;
	  USART_Init (USART1,&USART_InitStruct);
	  USART_Init (USART2,&USART_InitStruct);

	  USART_ITConfig (USART1,USART_IT_RXNE,ENABLE );
	  USART_ITConfig (USART2,USART_IT_RXNE,ENABLE );


		NVIC_InitStruct.NVIC_IRQChannel = USART1_IRQn;
		NVIC_InitStruct.NVIC_IRQChannelCmd = ENABLE ;
		NVIC_InitStruct.NVIC_IRQChannelPreemptionPriority = 1;
		NVIC_InitStruct.NVIC_IRQChannelSubPriority = 1;
		NVIC_Init (&NVIC_InitStruct);
		NVIC_InitStruct.NVIC_IRQChannel = USART2_IRQn;
		NVIC_InitStruct.NVIC_IRQChannelCmd = ENABLE ;
		NVIC_InitStruct.NVIC_IRQChannelPreemptionPriority = 1;
		NVIC_InitStruct.NVIC_IRQChannelSubPriority = 2;
    NVIC_Init (&NVIC_InitStruct);

		USART_Cmd (USART1,ENABLE);
		USART_Cmd (USART2,ENABLE);
}
void  Uart1SendString(u8 *pStr)
{
    while(USART_GetFlagStatus(USART1,USART_FLAG_TXE) == RESET);
	  while(*pStr != '\0')
		{
        USART_SendData (USART1,*pStr);
        pStr++;
        while(USART_GetFlagStatus(USART1,USART_FLAG_TXE) == RESET);
    }
}
void  USART1_IRQHandler()
{
    if(USART_GetITStatus (USART1,USART_IT_RXNE) == SET )
		{
        gUart1RecBuff[gReadCount1++] = USART_ReceiveData (USART1);
			  USART_ClearITPendingBit (USART1,USART_IT_RXNE);
    }
}
int main()
{
	NVIC_PriorityGroupConfig(NVIC_PriorityGroup_2);
	LedPinInit();
	UartInit();
	Uart1SendString((u8 *)"hello world\n");
	Uart1SendString((u8 *)"www.eepw.com.cn µç×Ó²úÆ·ÊÀ½ç\n");
	Uart1SendString((u8 *)"liklon Íæ GD32107VC-EVAL\n");
	Uart1SendString((u8 *)"--------------------------\n");

	while(1)
	{
		 Uart1SendString((u8 *)"\n\n");
     Uart1SendString((u8 *)"Send '1' LED ON..Send '2' LED OFF\n");
		 Uart1SendString((u8 *)"\n\n");
		 while(gReadCount1 == gRunCount1);
		 if(gUart1RecBuff[gRunCount1] == '1')
		 {
         LedPowerSelect(1);
			   Uart1SendString((u8 *)"LED ON\n");
     }
		 else if(gUart1RecBuff[gRunCount1] == '2')
		 {
         LedPowerSelect(2);
			   Uart1SendString((u8 *)"LED OFF\n");
     }
		 else
		 {
         Uart1SendString((u8 *)"invalid\n");
     }
		 gRunCount1 = gReadCount1;
	}
}
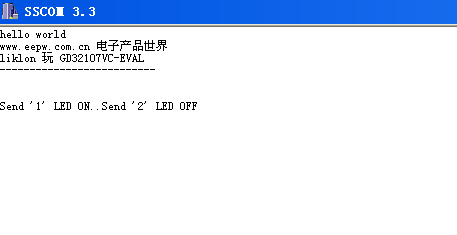
1、程序运行

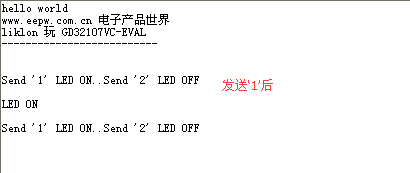
2、串口调试助手发送‘1’后

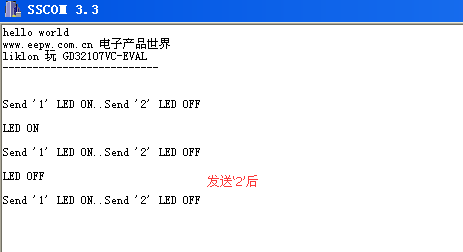
3、串口助手发送‘2’后

4、串口助手发送‘a’后

 我要赚赏金
我要赚赏金 STM32
STM32 MCU
MCU 通讯及无线技术
 物联网技术
物联网技术 电子DIY
电子DIY 板卡试用
板卡试用 基础知识
基础知识 软件与操作系统
 我爱生活
我爱生活 小e食堂
小e食堂

