
Stick PC,也称为USB计算机,目前非常流行。这些计算机的大小与USB加密狗一样,您可以轻松地将这台小型计算机插入监视器显示屏。
Novaspirit启动了一个名为Pi Zero USB Dongle的项目,创建了一台带有Raspberry Pi的计算机。“我一直在想办法更好地利用我的Raspberry Pi Zero,我想我找到了一个!”Novaspirit说道。将您的Raspberry Pi变成USB加密狗并与您的PC共享互联网!
在本文中,我将帮助您将Raspberry Pi Zero设置为小型USB计算机。你需要一个Pi Zero和一个定制的3D打印机壳,一个焊接到Pi Zero板的USB连接器(USB连接提供电源)。硬件本身相对简单,并且有定制软件使其运行IC更顺畅。在本文中,我将向您展示如何为USB Dongle构建自定义操作系统。
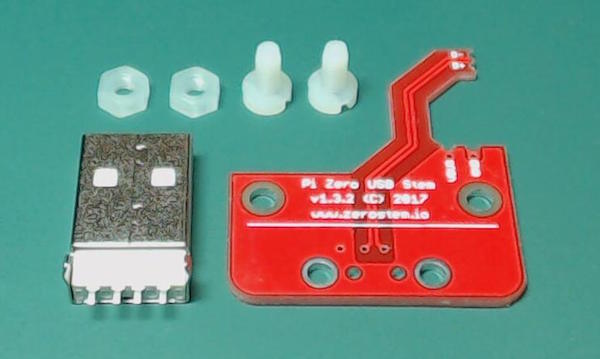
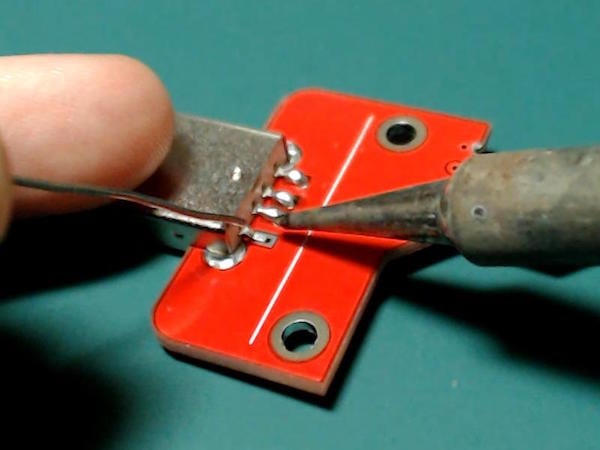
什么是零茎?Zero Stem设计为直接焊接到Raspberry Pi Zero底部的USB SMD测试垫。根本不需要电线或弹簧针,只需焊接!连接到Pi还可以创建便携式VNC服务器,甚至可以通过一个USB集线器集成多个Raspberry Pi零件。

Zero Stem与Raspberry Pi Zero v1.3和Raspberry Pi Zero W v1.1兼容,但不幸的是,由于它们的形状和大小,它与Raspberry Pi Zero v1.2或任何全尺寸Raspberry Pi不兼容。
入门:安装Raspbian如果你不知道如何在Raspberry Pi中安装Raspbian。
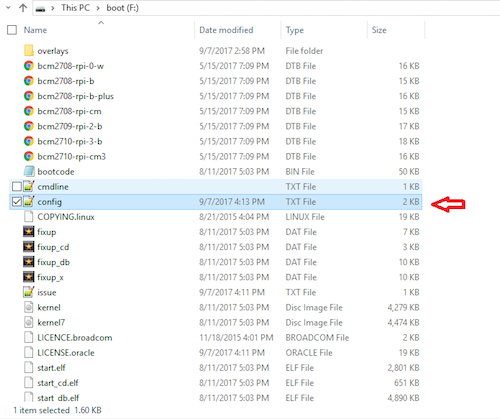
完成Raspbian的安装后,在SD卡的驱动器中找到刚刚复制了Raspbian图像文件的文件config.txt,然后在最后插入:
dtoverlay = dwc2

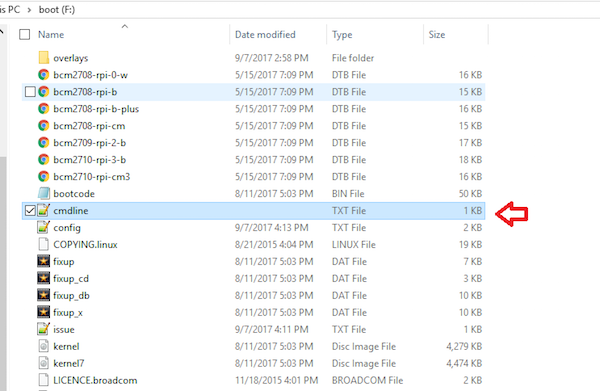
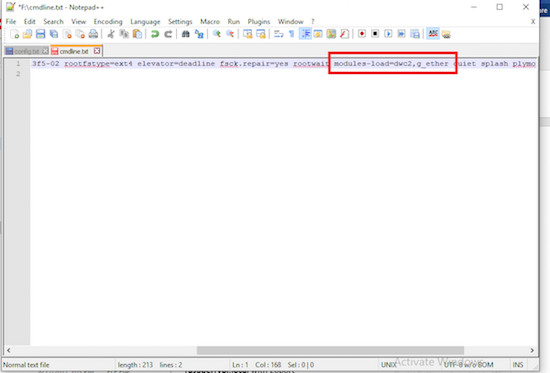
添加后,保存具有相同名称的文件,不要更改半导体其中的任何内容。在此之后,将文件放在名为cmdline.txt的同一目录中,并在rootwait之后插入文本:
模块负载= dwc2,g_ether
完成后,使用Raspberry Pi执行相同的操作并保存文件。您现在可以将SD卡插入Raspberry Pi Zero。
按照下图所示组装USB Stem,然后连接到计算机。


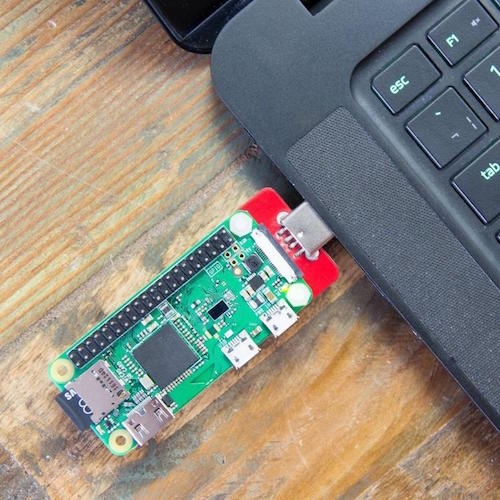
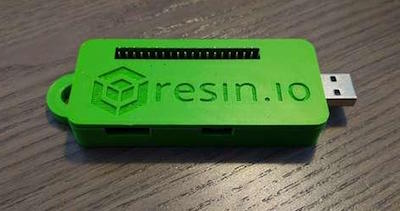
成品!
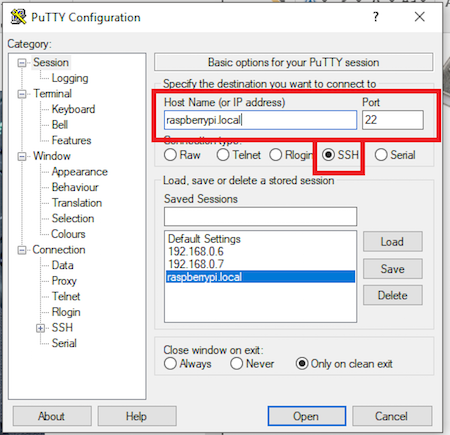
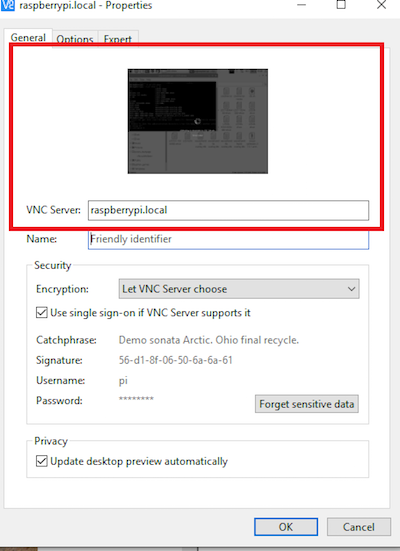
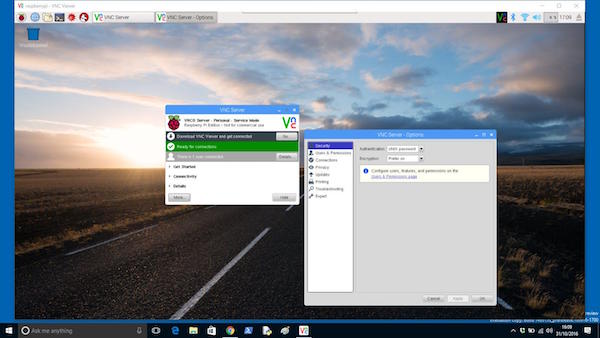
要从您的计算机访问您的Raspberry Pi,请使用ssh客户端或VNC查看器并将其指向:
raspberrypi.local与20port
访问SSH

VNC
您还可以将Raspberry Pi硬件放入3D打印的外壳中。我从Thingiverse.com 找到了这个案子。特别感谢这个案例的设计师Curcuz。
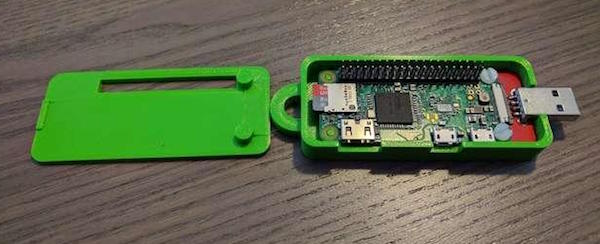
USB电脑如何装入机箱。
 我要赚赏金
我要赚赏金 STM32
STM32 MCU
MCU 通讯及无线技术
 物联网技术
物联网技术 电子DIY
电子DIY 板卡试用
板卡试用 基础知识
基础知识 软件与操作系统
 我爱生活
我爱生活 小e食堂
小e食堂

