
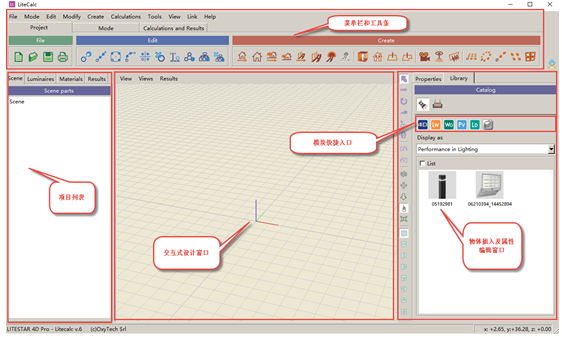
对于自由项目来说,大致步骤如下: 创建一个计算环境,环境可由不同物体组成 一个(室内或室外)环境,可绘制成2d或3d视图的 有2D.DXF文件导入做背景的环境 一个或数个工作面 从列表中插入的物体(如家具) 从外部导入的完整3D模型 输入或定义物体的特性(材料,反射等属性) 插入光源 执行照明计算,设置需要被验证的参数 结果数据的显示和渲染 确认结果并打印出来 接下来,我们以上述方式完成对办公室照明的设计。 1. 首先,打开LITESTAR Calc的操作界面。
 2. 导入室内的2D结构图,创建照明环境(此例中使用一个房屋的平面结构图)。“文件 File”– “导入Import”– “DXF文件DXF files”
 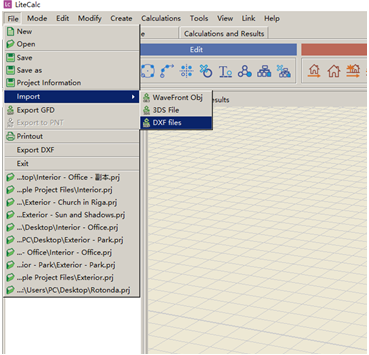 选中需导入的文件“Interior_Office.dxf”(名字必须为英文),弹出的导入对话框检查无误后,点击“OK”来完成导入。
 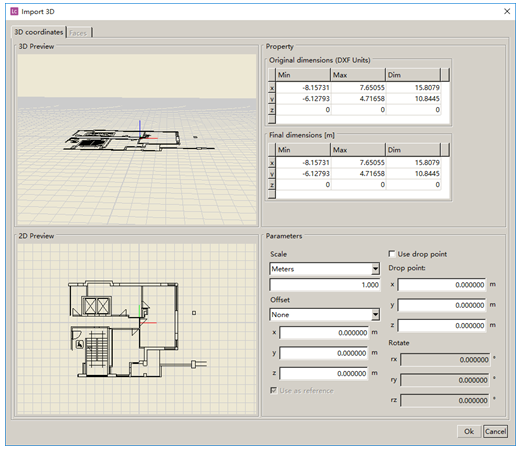 导入之后可以根据需要调整交互式窗口分布和显示视角等。
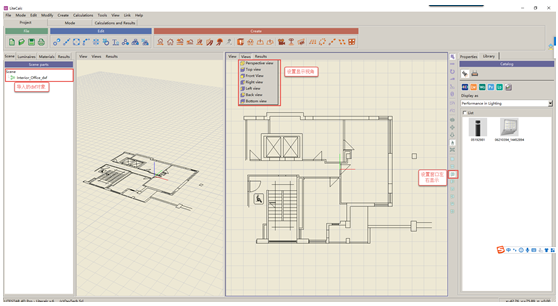 3. 创建室内环境,生成墙壁,地板和天花板等表面。选择“室内高级项目Advanced Project for Interiors”
  ,使用鼠标点选所要创建的区域(形成封闭区域)。设置完室内高度,工作面高度,各表面显示颜色及反射率等参数,以完成初步设置。
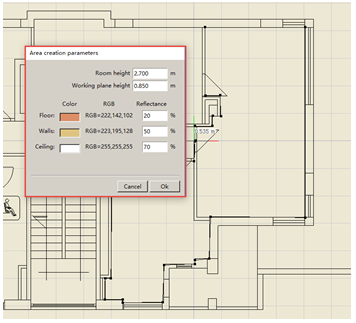
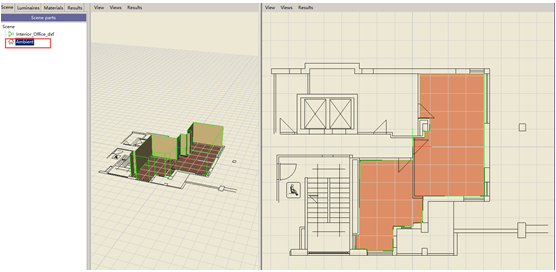 设置完成后的****和俯视图4. 更改墙体,地板和天花板材料属性。选中左侧场景中的“周围环境 Ambient”,选择右侧的“属性 Properties”选项卡,选择“调整 Modify”,可以打开“对象编辑器Object Editor”对话框,选中要调整的表面,如“地板 Floor”,在调整方式中选择需要的方式(此处,我们设置成条形木地板)。
  选择“编辑材料 Edit Material”,接着“选择纹理 Select Texture”,在文件夹中选择“室内木地板Indoor Floor Parquet”,再选择合适的纹理。选项卡中的部分,还可以用来调整反射率等信息(本例使用默认参数),点击OK完成地板参数调整。
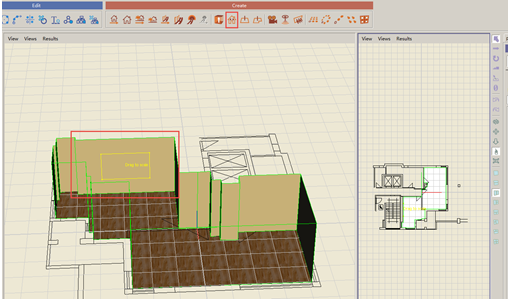
 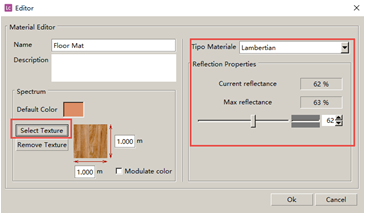 同样的方式,我们可以调整墙壁和天花板的参数。
5. 在墙上开一个窗户。调整视图,把****图窗口调大,并通过旋转 ,调整视图到需要开窗的墙面。点击“创建窗户Create Window”并点击需要开窗的墙面,则墙面上出现一个黄色矩形块,鼠标左边长按并拖动调整窗户的尺寸,按下“enter”键确定窗户尺寸,接着鼠标调节位置,并按下“enter”键,已确定位置。
 开窗前的墙体
 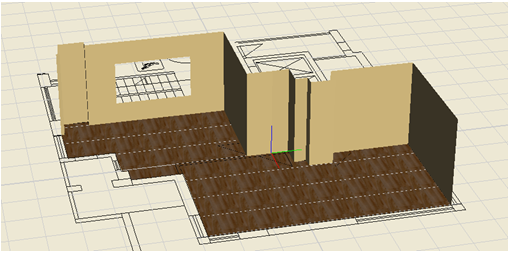 开窗后的墙体 6. 在室内放置陈设,此处我们放置办公桌和椅子调整到俯视图,选择“Library”- “家具 Furniture”- “桌子Desks”,并把需要用到的模型直接拖拽到需要放置的地方即可。
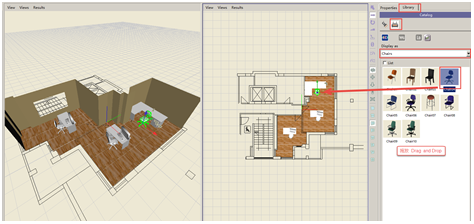 如需调整陈设的位置,可以通过垂直工具条或属性栏等工具做适当调整。
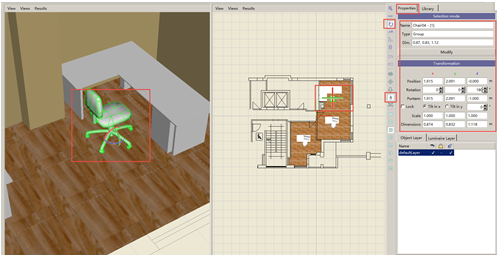 垂直工具条:
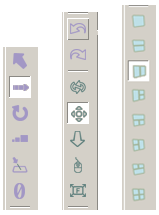
7. 插入光源,选择“创建光源组 Add Luminaires as Groups”,从照明设备管理组件Liswin中,选择合适的光源,并拖放该灯具的光度图至“光源Luminaire”。
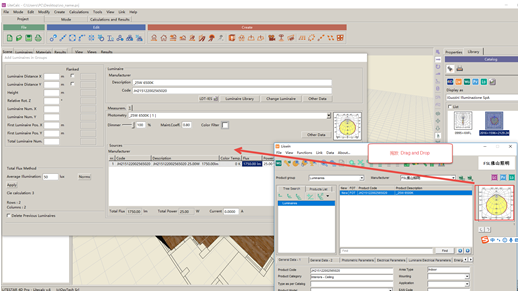 设置需要的照度,点击“应用Apply”,软件就自动计算出光源的需要的数量,接着点击“OK”来应用。
 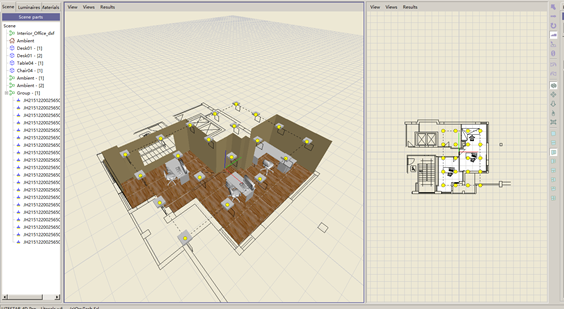 删去一部分不需要的光源并适当调整灯具位置,即可完成光源的设置。
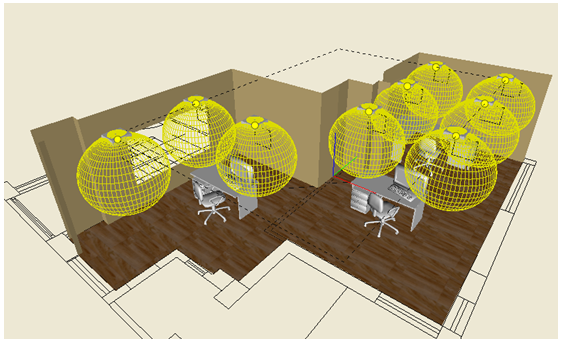 光源光度立体图 8. 进行照度计算,选择“计算和结果 Calculations and Results”- “开始计算Start Calculation”,设置计算参数后,点击“开始 Start”即可计算。
  9. 计算完成后,在输出的表格中,可以查看模型中某个面(本例以工作面Working Plane为例)对应的照度值,等高线图和伪彩色图,方便后期的验证。
 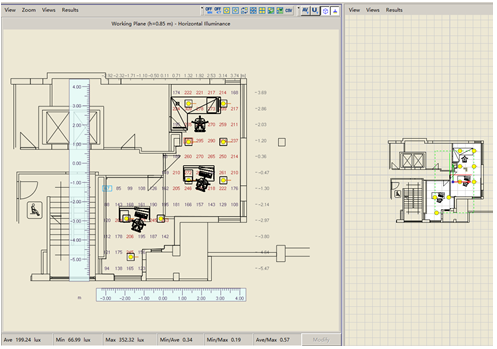 照度数据图
照度数据图  照度等高图
照度等高图 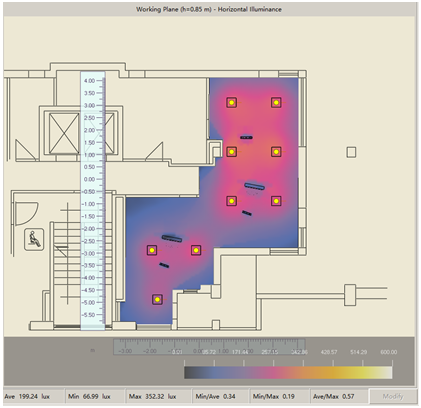 伪彩色图10. 使用色彩映射Tone Mapping功能,进行动态渲染,让渲染效果更接近人类的视觉感知。
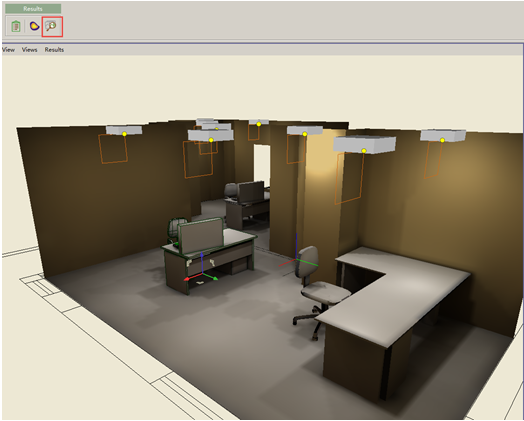 光线追迹渲染,调整合适的角度,选择“计算和结果 Calculations and Results” -“Start Rendering with Ray Tracing”,就可以获得渲染后的效果图。
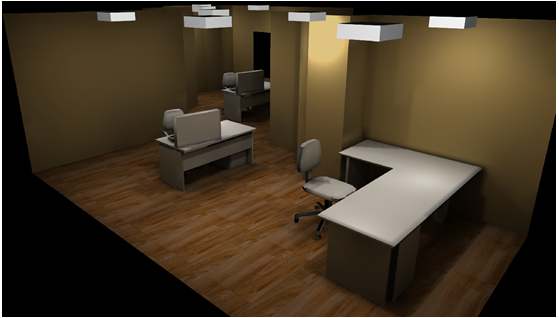 选择“获取图像Capture Image”来获得渲染后的图像。
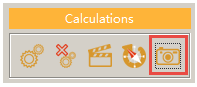 11. 当验证完成后,可以把照明设计结果打印成册。“文件File”- “打印 Print Out”,选择打印的部分即可。
 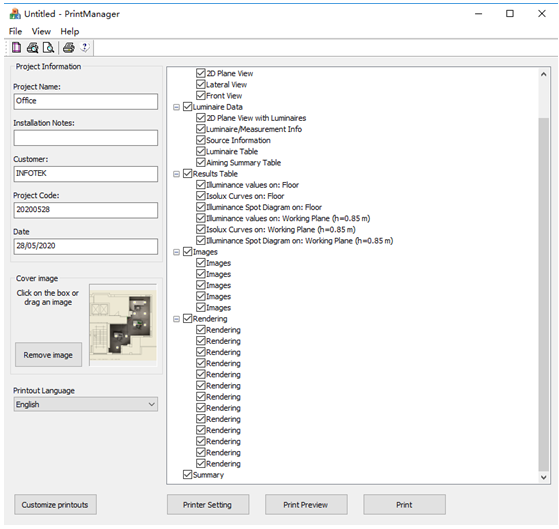 打印参数设置
  打印预览
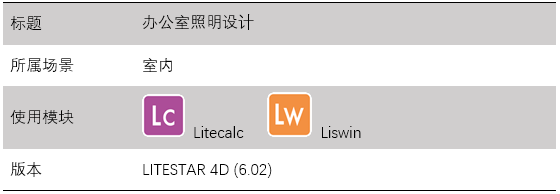
打印预览12. 文档信息
 我要赚赏金
我要赚赏金 STM32
STM32 MCU
MCU 通讯及无线技术
 物联网技术
物联网技术 电子DIY
电子DIY 板卡试用
板卡试用 基础知识
基础知识 软件与操作系统
 我爱生活
我爱生活 小e食堂
小e食堂

