
你想用你的智能手表来控制你周围的事物吗?这可以在几个小时内完成!在本教程中,我将向您展示如何使用Android Wear手表控制家用电器。我将使用Moto360手表,但您可以在任何Wear OS(以前的Android Wear)手表中安装该应用程序。在这个项目结束时,您可以通过轻弹手腕来控制任何电子设备。

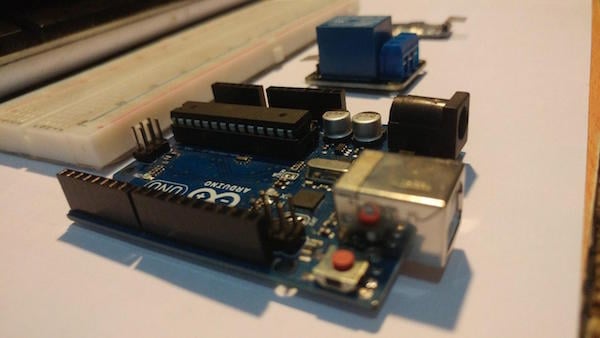
Arduino UNO
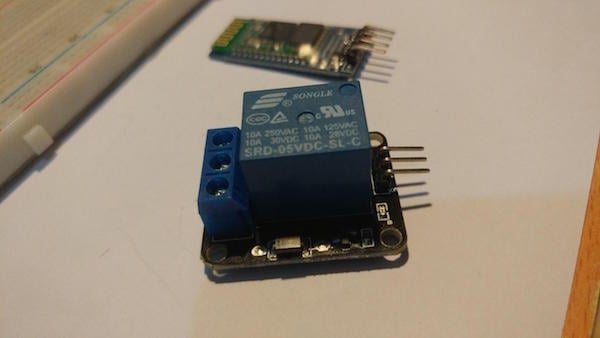
5V继电器

HC-06蓝牙模块
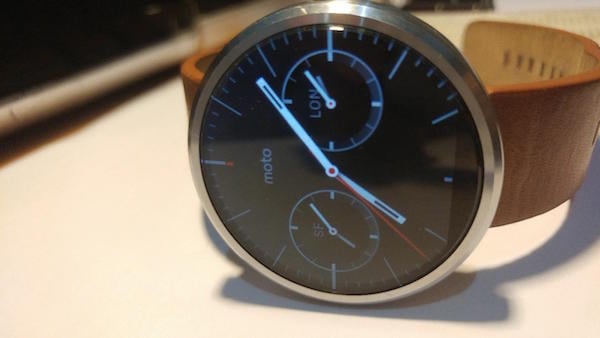
任何Wear OS手表(我将在本教程中使用我的Moto360手表)
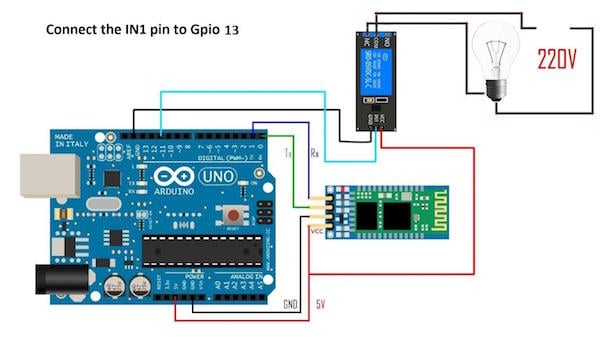
硬件组装按照下面的原理图连接硬件。
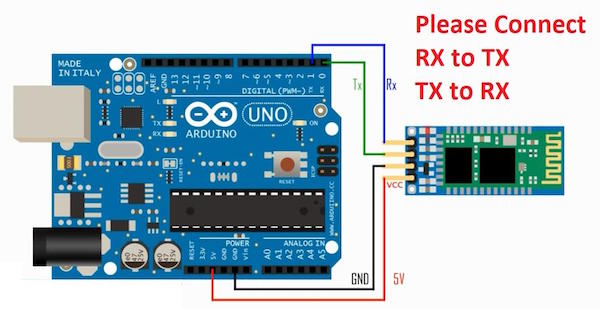
将Arduino UNO连接到HC-06蓝牙模块。
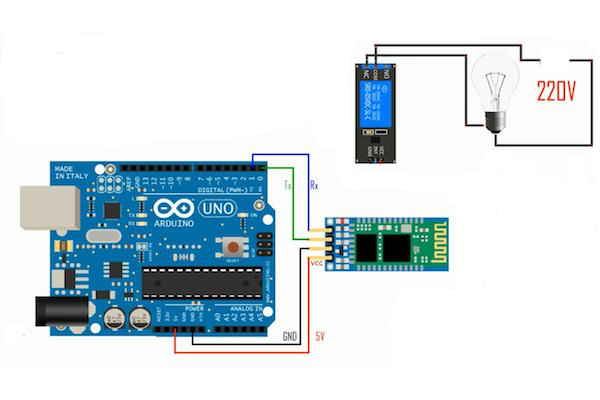
请小心这一步!首先取下电源。这将作为开关工作,因此卸下物理开关并连接到继电器引脚NC和COM并拧紧螺钉。
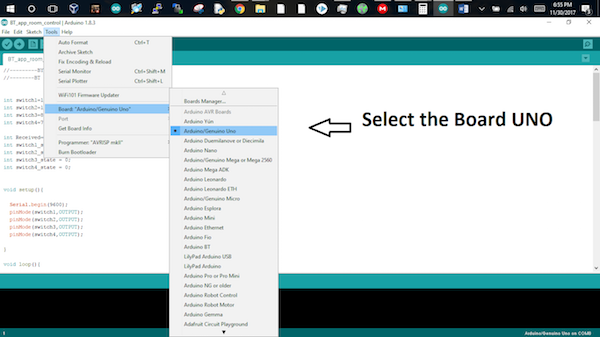
您可以在Arduino的网站上安装Arduino IDE 。
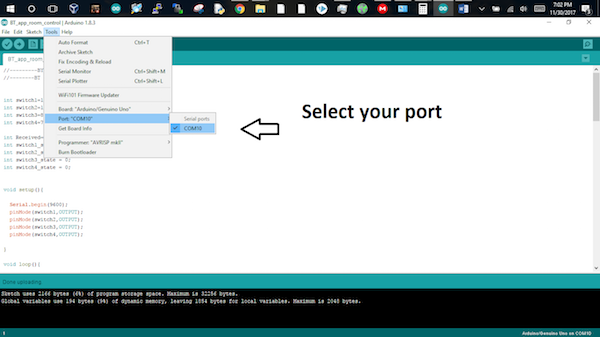
安装完成后,打开Arduino IDE并使用USB线连接Arduino UNO。
此代码使用Arduino的串行通信协议和蓝牙模块。Arduino的RX和TX引脚分别连接到HC-06蓝牙模块的TX和RX引脚。
蓝牙模块从配对的Android智能手表接收数据,并根据接收的数据触发中继。
这背后的代码非常简单。如果接收的数据是字符“1”,则继电器将被触发并接通,如果接收的数据是字符“0”,则继电器将被半导体关闭。
//--------BT app control---------//
//Program for four switches but in our case we are using pin 11
int switch1=11;
int switch2=12;
int switch3=8;
int switch4=7;
int Received=0;
int switch1_state =0;
int switch2_state =0;
int switch3_state = 0;
int switch4_state = 0;
void setup(){
Serial.begin(9600);
pinMode(switch1,OUTPUT);
pinMode(switch2,OUTPUT);
pinMode(switch3,OUTPUT);
pinMode(switch4,OUTPUT);
}
void loop(){
if(Serial.available()>0)
{
Received = Serial.read();
}
////////////////switch1/////////////////////
if (switch1_state == 0 && Received == '1')
{
digitalWrite(switch1,HIGH);
switch1_state=1;
Received=0;
}
if (switch1_state ==1 && Received == '1')
{
digitalWrite(switch1,LOW);
switch1_state=0;
Received=0;
}
////////////////switch2/////////////////////
if (switch2_state == 0 && Received == '2')
{
digitalWrite(switch2,HIGH);
switch2_state=1;
Received=0;
}
if (switch2_state ==1 && Received == '2')
{
digitalWrite(switch2,LOW);
switch2_state=0;
Received=0;
}
///////////////////////////////////////////
////////////////switch3/////////////////////
if (switch3_state == 0 && Received == '3')
{
digitalWrite(switch3,HIGH);
switch3_state=1;
Received=0;
}
if (switch3_state ==1 && Received == '3')
{
digitalWrite(switch3,LOW);
switch3_state=0;
Received=0;
}
///////////////////////////////////////////
////////////////switch4/////////////////////
if (switch4_state == 0 && Received == '4')
{
digitalWrite(switch4,HIGH);
switch4_state=1;
Received=0;
}
if (switch4_state ==1 && Received == '4')
{
digitalWrite(switch4,LOW);
switch4_state=0;
Received=0;
}
}
在Wear OS中安装apk下载smartwatch应用程序的apk文件。
通过Wi-Fi使用ADB,请按照以下步骤在智能手表上安装应用:
转到手表上的开发设置,然后打开ADB和蓝牙ADB。
转到手机上Android Wear应用中的蓝牙设置,然后通过蓝牙转动ADB。
在您的计算机上获取基本adb
将手机与计算机IC连接,然后打开开发人员中的ADB USB选项
完成此设置后在计算机中,打开包含ADB文件和apk的文件夹中的控制台。
执行命令:adb Devices, adb forward tcp :6666, localabstract :/ adb-hub, adb connect localhost:6666
与手表建立连接后,选择“adb -e install apkname.apk”。
如果您位于包含该文件的目录之外,请使用正确的路径将apkname替换为BluetoothWatch -debug.apk。
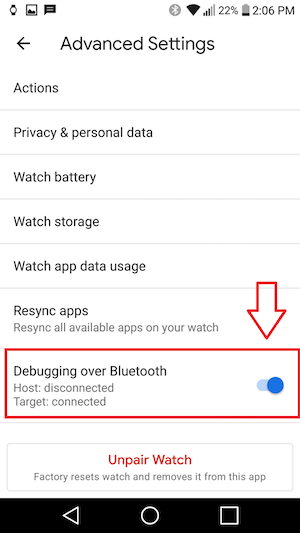
您需要在上面列出的第二步中访问的菜单。
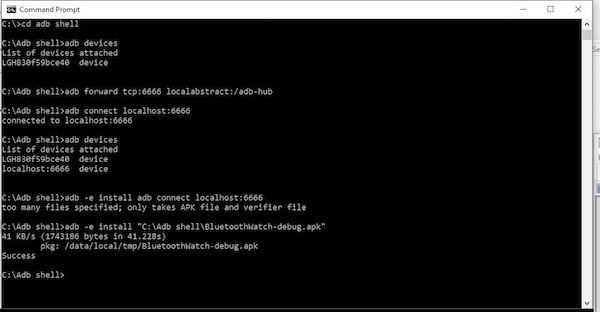
正确安装应用程序后,命令的外观如何。
如何配对蓝牙设备安装完成后,将智能手表连接到HC-06模块。
您需要将HC-06蓝牙模块与Android智能手表配对,然后才能在应用程序中使用它。

您应该可以在智能手表上看到HC-06设备。
现在请执行以下步骤:
打开设备的蓝牙设置并搜索新设备,确保HC-06模块上的LED持续闪烁(配对模式)。
选择HC-06(或者您将看到以“C”结尾的地址,如图所示)。
输入PIN“1234”并按OK。
打开“Wear OS”应用程序,然后单击屏幕顶部的蓝牙按钮。
从列表中选择“HC-06”。
使用带有灯泡图标的开关或摇动手表以打开/关闭继电器。确保您的Arduino已经上传了上面的代码。
如果要调整摇动校准,请单击设置图标。
就是这样!您的智能手表现已连接。您现在可以通过蓝牙通过手表控制5V继电器。
 我要赚赏金
我要赚赏金 STM32
STM32 MCU
MCU 通讯及无线技术
 物联网技术
物联网技术 电子DIY
电子DIY 板卡试用
板卡试用 基础知识
基础知识 软件与操作系统
 我爱生活
我爱生活 小e食堂
小e食堂

