Let'sDo第2期任务-《贪吃蛇》-游戏背景音乐(个性化)
—、编程环境搭建
本次任务开发环境是在VSCODE上的platformIO平台上完成的,该平台赋予了Arduino更加强大的功能和活力。 platformIO 平台为 Arduino 带来了诸多令人瞩目的特性和优点,使其功能更加强大、活力四溢。首先,该平台提供了广泛的硬件支持。它兼容众多 Arduino 开发板以及各种传感器、模块等外设,使得开发者能够轻松选择适合自己项目的硬件组合,极大地拓展了 Arduino 的应用范围。其次,platformIO 拥有强大的库管理功能。开发者可以方便地搜索、安装和管理各种所需的库,节省了大量寻找和配置库的时间,提高了开发效率。
此外,该平台提供了智能代码编辑功能,包括代码自动完成、语法检查和错误提示等,使开发者能够更加准确地编写代码,减少错误的发生。platformIO 还支持多平台开发,无论是 Windows、Mac 还是 Linux 系统,都能流畅运行,为开发者提供了更大的灵活性和便利性。
最重要的是,它具备高效的编译和上传功能,大大缩短了开发周期,让开发者能够更快地将想法转化为实际的项目。platformIO 拥有活跃的社区和丰富的文档资源,开发者可以在社区中与其他开发者交流经验、解决问题,获取更多的灵感和帮助。
platformio.ini文件的配置如下:
[env:pico]
platform = raspberrypi
board = pico
framework = arduino
build_flags = -w -g
    -D ARDUINO_ARCH_MBED_RP2040
; -D LV_CONF_INCLUDE_SIMPLE=1
; -D LV_LVGL_H_INCLUDE_SIMPLE=1
; -I include

; [env:pico]
; platform = https://github.com/maxgerhardt/platform-raspberrypi.git
; board = pico
; framework = arduino
; board_build.core = earlephilhower
; build_flags = -w -g
;     -D ARDUINO_ARCH_MBED_RP2040
另外,earlephilhower 第三方民间支持库功能很强大,但是在PIO上安装难度很大。需要安装的内容很多,需要非常强的网络连接能力支持,长达几个小时的月球网络连接,花光我的人品积蓄,所以在国内的网络环境,不建议使用,除非你有跟我这样的耐心,不断地刷刷。


二、 驱动屏幕:
使用TFT_eSPI 驱动屏幕主要工作量是在于配用户文件。把Setup138_Pico_Explorer_Base_RP2040_ST7789.h 文件放到User_Setups文件夹里即可。
#define ST7789_DRIVER     // Configure all registers

#define TFT_WIDTH  320
#define TFT_HEIGHT 240
#define TFT_BACKLIGHT_ON HIGH //开启backlight还要启动这个。
// #define CGRAM_OFFSET      // Library will add offsets required
// #define TFT_INVERSION_ON
// For Pico Explorer Base (PR2040)

// #define TFT_RGB_ORDER TFT_RGB  // Colour order Red-Green-Blue //调整颜色顺序。
 #define TFT_RGB_ORDER TFT_BGR  // Colour order Blue-Green-Red  //调整颜色顺序。
#define TFT_CS 17   // Chip Select pin
#define TFT_DC 16   // Data Command control pin
#define TFT_RST -1  // No Reset pin
#define TFT_MOSI 19
#define TFT_SCLK 18
#define TFT_BL   20
#define TFT_BL 20 要配合使用#define TFT_BACKLIGHT_ON HIGH //不然屏幕不会点亮,不要问我是怎么知道的。
颜色顺序通过这两行代码来调节,总有一款适合你。
// #define TFT_RGB_ORDER TFT_RGB // Colour order Red-Green-Blue //调整颜色顺序。
#define TFT_RGB_ORDER TFT_BGR // Colour order Blue-Green-Red
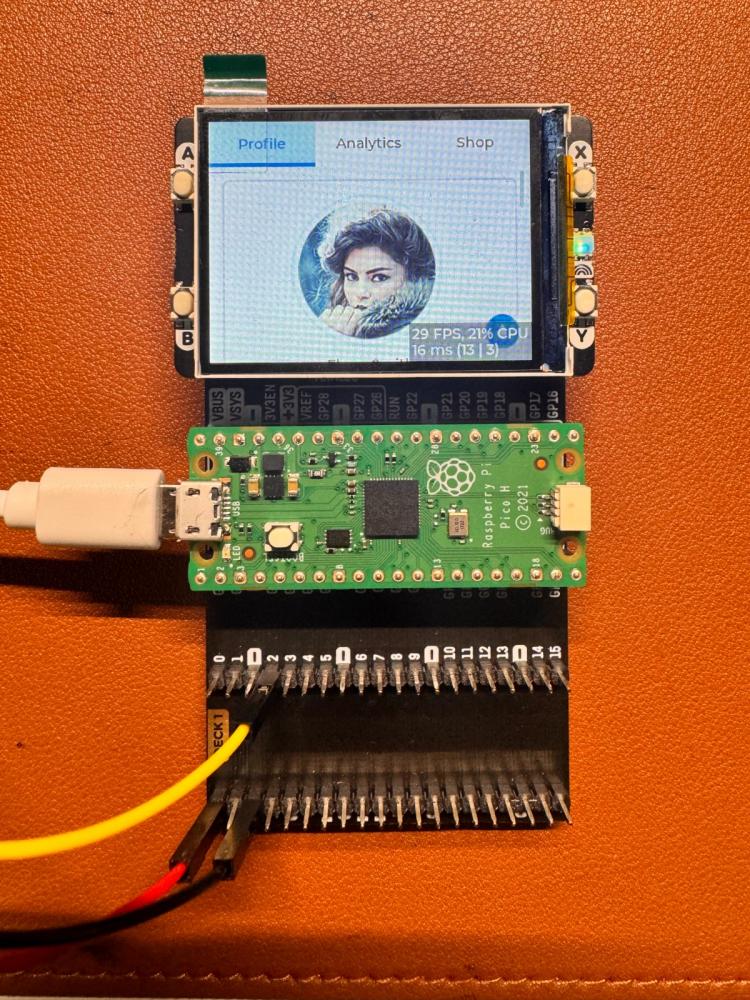
三、移植LVGL9.1版本
LVGL对TFT_eSPI非常友好,原生级别的支持,只要用TFT_eSPI驱动屏幕后,在移植LVGL就很简单。 因为本次任务不打算用LVGL来实现,但是基于LVGL的火热程度,自然要给管上才能大快人心。
/*Using LVGL with Arduino requires some extra steps:
 *Be sure to read the docs here: https://docs.lvgl.io/master/get-started/platforms/arduino.html  */

#include "lvgl/lvgl.h"
#include "lvgl/examples/lv_examples.h"
#include "lvgl/demos/lv_demos.h"
#if LV_USE_TFT_ESPI
#include <TFT_eSPI.h>
#endif

/*To use the built-in examples and demos of LVGL uncomment the includes below respectively.
 *You also need to copy `lvgl/examples` to `lvgl/src/examples`. Similarly for the demos `lvgl/demos` to `lvgl/src/demos`.
 *Note that the `lv_examples` library is for LVGL v7 and you shouldn't install it for this version (since LVGL v8)
 *as the examples and demos are now part of the main LVGL library. */

// #include <examples/lv_examples.h>
// #include <demos/lv_demos.h>

/*Set to your screen resolution*/
#define TFT_HOR_RES 320
#define TFT_VER_RES 240

/*LVGL draw into this buffer, 1/10 screen size usually works well. The size is in bytes*/
#define DRAW_BUF_SIZE (TFT_HOR_RES * TFT_VER_RES / 10 * (LV_COLOR_DEPTH / 8))
uint32_t draw_buf[DRAW_BUF_SIZE / 4];

#if LV_USE_LOG != 0
void my_print(lv_log_level_t level, const char *buf)
{
    LV_UNUSED(level);
    Serial.println(buf);
    Serial.flush();
}
#endif

/* LVGL calls it when a rendered image needs to copied to the display*/
void my_disp_flush(lv_display_t *disp, const lv_area_t *area, uint8_t *px_map)
{
    /*Copy `px map` to the `area`*/

    /*For example ("my_..." functions needs to be implemented by you)
    uint32_t w = lv_area_get_width(area);
    uint32_t h = lv_area_get_height(area);

    my_set_window(area->x1, area->y1, w, h);
    my_draw_bitmaps(px_map, w * h);
     */

    /*Call it to tell LVGL you are ready*/
    lv_disp_flush_ready(disp);
}

/*Read the touchpad*/
void my_touchpad_read(lv_indev_t *indev, lv_indev_data_t *data)
{
    /*For example  ("my_..." functions needs to be implemented by you)
    int32_t x, y;
    bool touched = my_get_touch( &x, &y );

    if(!touched) {
        data->state = LV_INDEV_STATE_RELEASED;
    } else {
        data->state = LV_INDEV_STATE_PRESSED;

        data->point.x = x;
        data->point.y = y;
    }
     */
}

void setup()
{
    String LVGL_Arduino = "Hello  ";
    LVGL_Arduino += String('V') + lv_version_major() + "." + lv_version_minor() + "." + lv_version_patch();

    Serial.begin(115200);
    Serial.println(LVGL_Arduino);
    // pinMode(20, OUTPUT);
    // digitalWrite(20, HIGH);
    lv_init();

    /*Set a tick source so that LVGL will know how much time elapsed. */
    lv_tick_set_cb(millis);

    /* register print function for debugging */
#if LV_USE_LOG != 0
    lv_log_register_print_cb(my_print);
#endif

    lv_display_t *disp;
#if LV_USE_TFT_ESPI
    /*TFT_eSPI can be enabled lv_conf.h to initialize the display in a simple way*/
    disp = lv_tft_espi_create(TFT_HOR_RES, TFT_VER_RES, draw_buf, sizeof(draw_buf));
#else
    /*Else create a display yourself*/
    disp = lv_display_create(TFT_HOR_RES, TFT_VER_RES);
    lv_display_set_flush_cb(disp, my_disp_flush);
    lv_display_set_buffers(disp, draw_buf, NULL, sizeof(draw_buf), LV_DISPLAY_RENDER_MODE_PARTIAL);
#endif

    /*Initialize the (dummy) input device driver*/
    lv_indev_t *indev = lv_indev_create();
    lv_indev_set_type(indev, LV_INDEV_TYPE_POINTER); /*Touchpad should have POINTER type*/
    lv_indev_set_read_cb(indev, my_touchpad_read);

    /* Create a simple label
     * ---------------------
     lv_obj_t *label = lv_label_create( lv_scr_act() );
     lv_label_set_text( label, "Hello Arduino, I'm LVGL!" );
     lv_obj_align( label, LV_ALIGN_CENTER, 0, 0 );

     * Try an example. See all the examples
     *  - Online: https://docs.lvgl.io/master/examples.html
     *  - Source codes: https://github.com/lvgl/lvgl/tree/master/examples
     * ----------------------------------------------------------------

     lv_example_btn_1();

     * Or try out a demo. Don't forget to enable the demos in lv_conf.h. E.g. LV_USE_DEMOS_WIDGETS
     * -------------------------------------------------------------------------------------------

     lv_demo_widgets();

     */

    lv_obj_t *label = lv_label_create(lv_scr_act());
    lv_label_set_text_fmt(label, "%s", LVGL_Arduino.c_str());
    lv_obj_align(label, LV_ALIGN_CENTER, 0, 0);
    // lv_demo_benchmark();
    lv_demo_widgets();

    Serial.println("Setup done");
}

void loop()
{
    lv_task_handler(); /* let the GUI do its work */
    delay(5);          /* let this time pass */
}

 我要赚赏金
我要赚赏金

