大家好
接下来我将驱动板子完成以下任务
1. 按钮信号获取(在屏幕上打印状态)
2. 光强获取
3. 点亮板载屏幕
来我将
因本人对arduino比较熟悉
所以后续的代码开发将使用arduino IDE完成
https://www.arduino.cc/en/software
有需要的小伙伴可以自行下载软件
首先点亮板载屏幕
接下来上代码
// SPDX-FileCopyrightText: 2022 Limor Fried for Adafruit Industries
//
// SPDX-License-Identifier: MIT

#include <Arduino.h>
#include "Adafruit_MAX1704X.h"
#include <Adafruit_NeoPixel.h>
#include "Adafruit_TestBed.h"
#include <Adafruit_BME280.h>
#include <Adafruit_ST7789.h>
#include <Fonts/FreeSans12pt7b.h>

Adafruit_BME280 bme; // I2C
bool bmefound = false;
extern Adafruit_TestBed TB;

Adafruit_MAX17048 lipo;
Adafruit_ST7789 display = Adafruit_ST7789(TFT_CS, TFT_DC, TFT_RST);

GFXcanvas16 canvas(240, 135);

void setup() {
  Serial.begin(115200);
  //while (! Serial) delay(10);
  delay(100);

  TB.neopixelPin = PIN_NEOPIXEL;
  TB.neopixelNum = 1;
  TB.begin();
  TB.setColor(WHITE);

  display.init(135, 240);           // Init ST7789 240x135
  display.setRotation(3);
  canvas.setFont(&FreeSans12pt7b);
  canvas.setTextColor(ST77XX_WHITE);

  if (!lipo.begin()) {
    Serial.println(F("Couldnt find Adafruit MAX17048?\nMake sure a battery is plugged in!"));
    while (1) delay(10);
  }

  Serial.print(F("Found MAX17048"));
  Serial.print(F(" with Chip ID: 0x"));
  Serial.println(lipo.getChipID(), HEX);

  if (TB.scanI2CBus(0x77)) {
    Serial.println("BME280 address");

    unsigned status = bme.begin();
    if (!status) {
      Serial.println("Could not find a valid BME280 sensor, check wiring, address, sensor ID!");
      Serial.print("SensorID was: 0x"); Serial.println(bme.sensorID(),16);
      Serial.print("        ID of 0xFF probably means a bad address, a BMP 180 or BMP 085\n");
      Serial.print("   ID of 0x56-0x58 represents a BMP 280,\n");
      Serial.print("        ID of 0x60 represents a BME 280.\n");
      Serial.print("        ID of 0x61 represents a BME 680.\n");
      return;
    }
    Serial.println("BME280 found OK");
    bmefound = true;
  }

  pinMode(0, INPUT_PULLUP);
  pinMode(1, INPUT_PULLDOWN);
  pinMode(2, INPUT_PULLDOWN);
}

int j = 0;

void loop() {
  bool valid_i2c[128];
  Serial.println("**********************");

  if (j == 0) {
    Serial.print("I2C scan: ");
    for (int i=0; i< 128; i++) {
      if (TB.scanI2CBus(i, 0)) {
        Serial.print("0x");
        Serial.print(i, HEX);
        Serial.print(", ");
        valid_i2c[i] = true;
      } else {
        valid_i2c[i] = false;
      }
    }
  }

  if (j % 2 == 0) {
    canvas.fillScreen(ST77XX_BLACK);
    canvas.setCursor(0, 17);
    canvas.setTextColor(ST77XX_RED);
    canvas.println("Adafruit Feather");
    canvas.setTextColor(ST77XX_YELLOW);
    canvas.println("HELLO EEPW");
    canvas.setTextColor(ST77XX_GREEN);
    canvas.print("Buttons: ");
    Serial.println(digitalRead(0));
    Serial.println(digitalRead(1));
    Serial.println(digitalRead(2));
    if (!digitalRead(0)) {
      canvas.print("D0, ");
    }
    if (digitalRead(1)) {
      canvas.print("D1, ");
    }
    if (digitalRead(2)) {
      canvas.print("D2, ");
    }
    display.drawRGBBitmap(0, 0, canvas.getBuffer(), 240, 135);
    pinMode(TFT_BACKLITE, OUTPUT);
    digitalWrite(TFT_BACKLITE, HIGH);
  }

  TB.setColor(TB.Wheel(j++));
  delay(10);
  return;
}
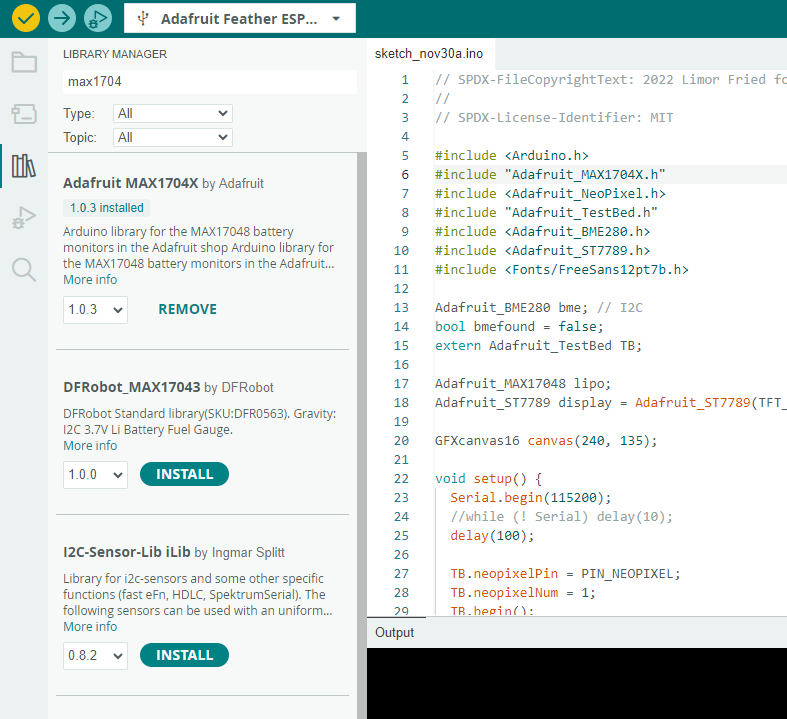
编译过程可能会报错

根据错误提示信息
安装相关代码库
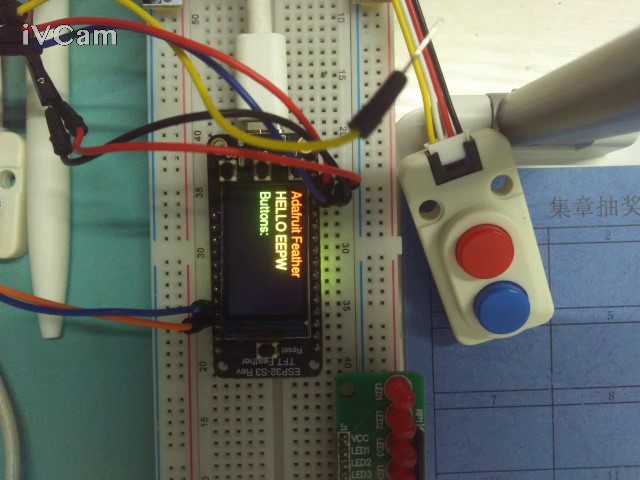
程序运行效果图,成功显示“HELLO EEPW"
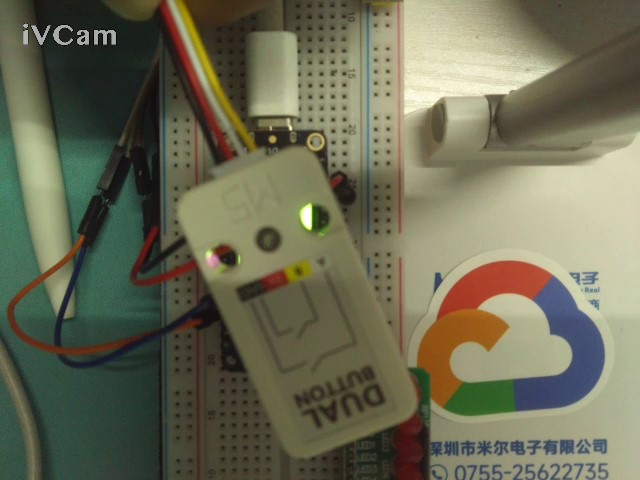
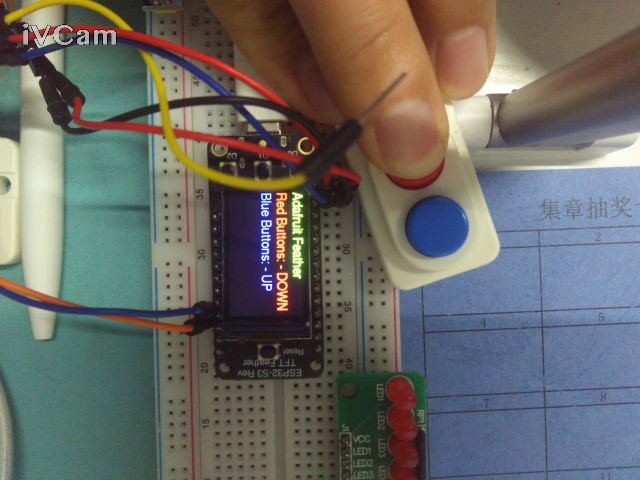
接下来我们将在屏幕上显示按键状态
使用5.6两个引脚检测按键状态
这里强调一下,按键模块的电源需要连接,不接的话会导致按键状态读取异常。
按键读取并显示相关代码如下
// SPDX-FileCopyrightText: 2022 Limor Fried for Adafruit Industries
//
// SPDX-License-Identifier: MIT

#include <Arduino.h>
#include <Adafruit_NeoPixel.h>
#include <Adafruit_ST7789.h>
#include <Fonts/FreeSans12pt7b.h>

Adafruit_ST7789 display = Adafruit_ST7789(TFT_CS, TFT_DC, TFT_RST);

GFXcanvas16 canvas(240, 135);

void setup() {
  Serial.begin(115200);
  //while (! Serial) delay(10);
  delay(100);

  display.init(135, 240);           // Init ST7789 240x135
  display.setRotation(3);
  canvas.setFont(&FreeSans12pt7b);
  canvas.setTextColor(ST77XX_WHITE);

  pinMode(5, INPUT_PULLUP);
  pinMode(6, INPUT_PULLUP);
}

int j = 0;

void loop() {

  if (j % 2 == 0) {
    canvas.fillScreen(ST77XX_BLACK);
    canvas.setCursor(0, 17);
    canvas.setTextColor(ST77XX_YELLOW);
    canvas.println("Adafruit Feather");

    canvas.setTextColor(ST77XX_RED);
    canvas.print("Red Buttons: ");
    if (digitalRead(5)) {
      canvas.print("- UP");
    }
    else
    {
      canvas.print("- DOWN");
    }
    canvas.println("");

    canvas.setTextColor(ST77XX_BLUE);
    canvas.print("Blue Buttons: ");
    if (digitalRead(6)) {
      canvas.print("- UP");
    }
    else
    {
      canvas.print("- DOWN");
    }
    canvas.println("");

    display.drawRGBBitmap(0, 0, canvas.getBuffer(), 240, 135);
    pinMode(TFT_BACKLITE, OUTPUT);
    digitalWrite(TFT_BACKLITE, HIGH);
  }

  delay(10);
  return;
}
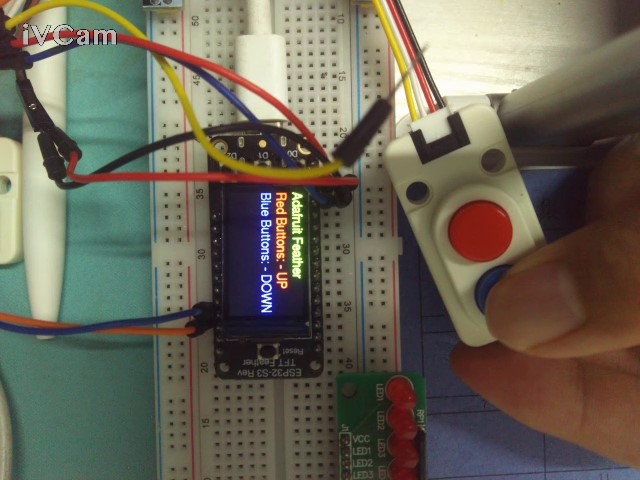
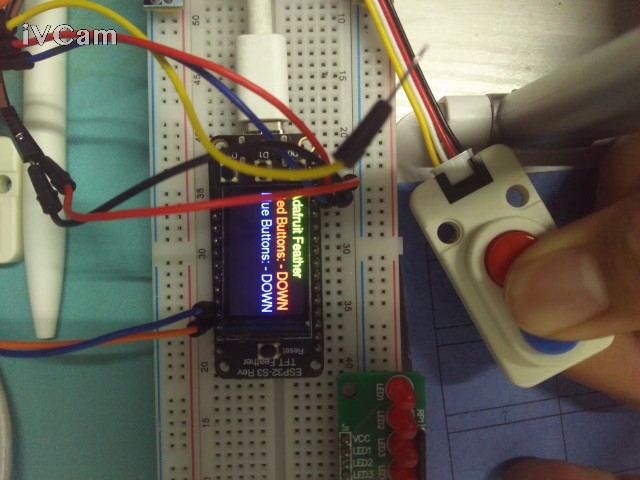
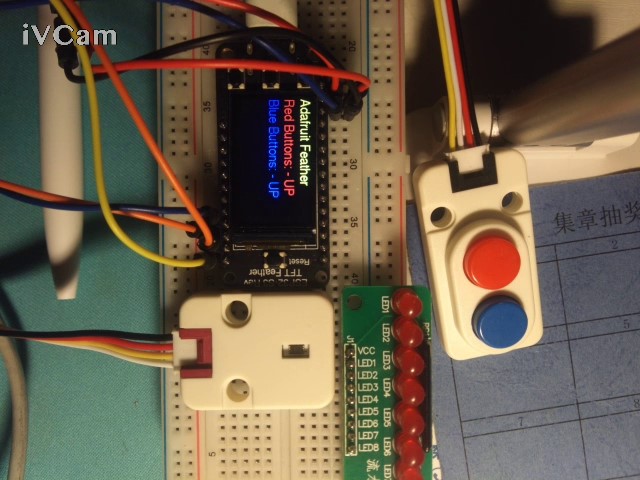
程序运行效果
按键未按下
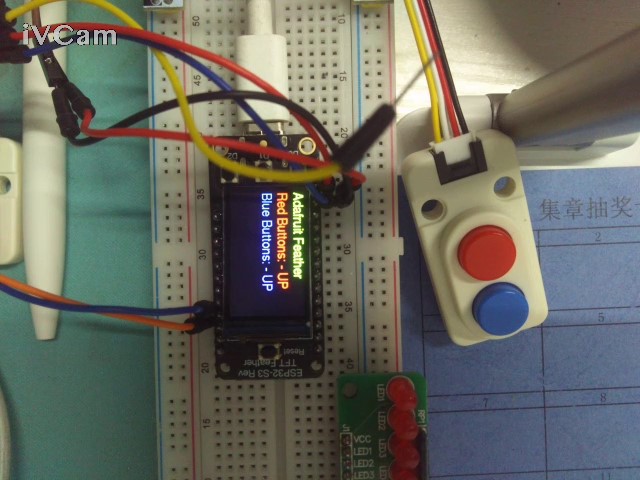
按下红色按键
按下蓝色按键
两个按键同时按下
后面我们再接上BH1750模块
安装相关代码库
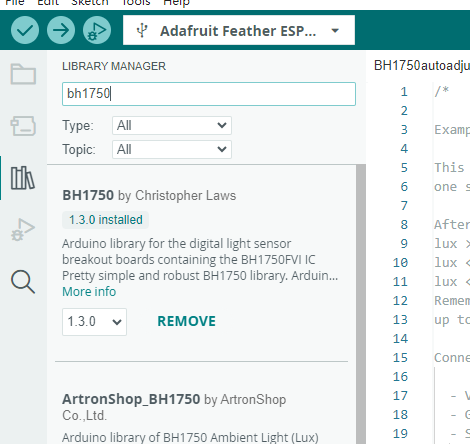
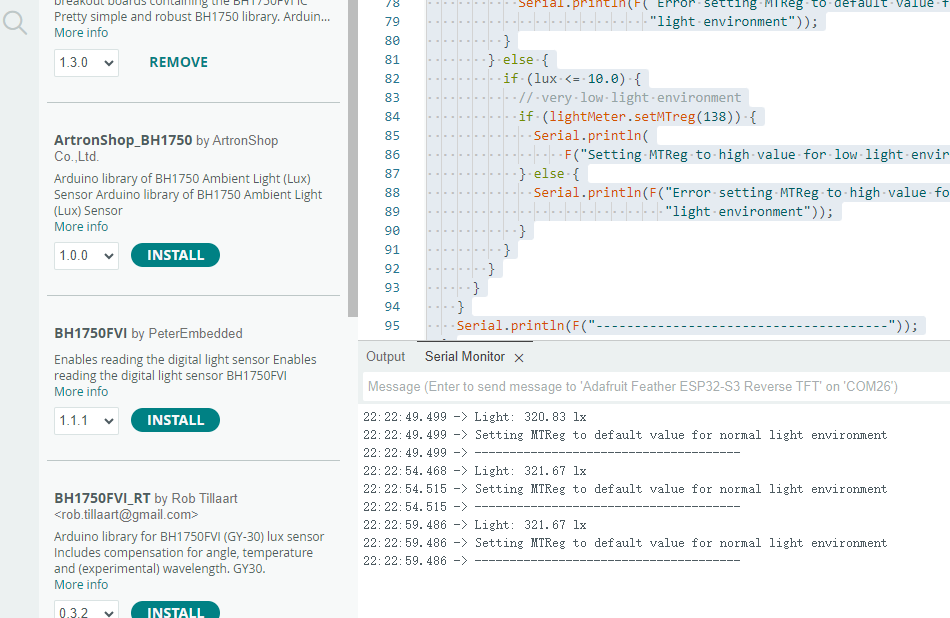
首先使用测试例程,通过串口打印数据
代码如下
/*

Example of BH1750 library usage.

This example initialises the BH1750 object using the default high resolution
one shot mode and then makes a light level reading every five seconds.

After the measurement the MTreg value is changed according to the result:
lux > 40000 ==> MTreg =  32
lux < 40000 ==> MTreg =  69  (default)
lux <    10 ==> MTreg = 138
Remember to test your specific sensor! Maybe the MTreg value range from 31
up to 254 is not applicable to your unit.

Connections

  - VCC to 3V3 or 5V
  - GND to GND
  - SCL to SCL (A5 on Arduino Uno, Leonardo, etc or 21 on Mega and Due, on
    esp8266 free selectable)
  - SDA to SDA (A4 on Arduino Uno, Leonardo, etc or 20 on Mega and Due, on
    esp8266 free selectable)
  - ADD to (not connected) or GND

ADD pin is used to set sensor I2C address. If it has voltage greater or equal to
0.7VCC voltage (e.g. you've connected it to VCC) the sensor address will be
0x5C. In other case (if ADD voltage less than 0.7 * VCC) the sensor address will
be 0x23 (by default).

*/

#include <BH1750.h>
#include <Wire.h>

BH1750 lightMeter;

void setup() {

  Serial.begin(9600);

  // Initialize the I2C bus (BH1750 library doesn't do this automatically)
  Wire.begin();
  // On esp8266 you can select SCL and SDA pins using Wire.begin(D4, D3);

  lightMeter.begin(BH1750::ONE_TIME_HIGH_RES_MODE);
  // lightMeter.setMTreg(69);  // not needed, only mentioning it

  Serial.println(F("BH1750 Test begin"));
}

void loop() {
  // we use here the maxWait option due fail save
  if (lightMeter.measurementReady(true)) {
    float lux = lightMeter.readLightLevel();
    Serial.print(F("Light: "));
    Serial.print(lux);
    Serial.println(F(" lx"));

    if (lux < 0) {
      Serial.println(F("Error condition detected"));
    } else {
      if (lux > 40000.0) {
        // reduce measurement time - needed in direct sun light
        if (lightMeter.setMTreg(32)) {
          Serial.println(
              F("Setting MTReg to low value for high light environment"));
        } else {
          Serial.println(
              F("Error setting MTReg to low value for high light environment"));
        }
      } else {
        if (lux > 10.0) {
          // typical light environment
          if (lightMeter.setMTreg(69)) {
            Serial.println(F(
                "Setting MTReg to default value for normal light environment"));
          } else {
            Serial.println(F("Error setting MTReg to default value for normal "
                             "light environment"));
          }
        } else {
          if (lux <= 10.0) {
            // very low light environment
            if (lightMeter.setMTreg(138)) {
              Serial.println(
                  F("Setting MTReg to high value for low light environment"));
            } else {
              Serial.println(F("Error setting MTReg to high value for low "
                               "light environment"));
            }
          }
        }
      }
    }
    Serial.println(F("--------------------------------------"));
  }
  delay(5000);
}
串口信息打印正常,证明接线没有问题
接下来把两段代码整合一下
// SPDX-FileCopyrightText: 2022 Limor Fried for Adafruit Industries
//
// SPDX-License-Identifier: MIT

#include <Arduino.h>
#include <Adafruit_NeoPixel.h>
#include <Adafruit_ST7789.h>
#include <Fonts/FreeSans12pt7b.h>

#include <BH1750.h>
#include <Wire.h>

BH1750 lightMeter;

Adafruit_ST7789 display = Adafruit_ST7789(TFT_CS, TFT_DC, TFT_RST);

GFXcanvas16 canvas(240, 135);

void setup() {
  Serial.begin(115200);
  //while (! Serial) delay(10);
  delay(100);

  // Initialize the I2C bus (BH1750 library doesn't do this automatically)
  Wire.begin();
  lightMeter.begin(BH1750::ONE_TIME_HIGH_RES_MODE);

  display.init(135, 240);           // Init ST7789 240x135
  display.setRotation(3);
  canvas.setFont(&FreeSans12pt7b);
  canvas.setTextColor(ST77XX_WHITE);

  pinMode(5, INPUT_PULLUP);
  pinMode(6, INPUT_PULLUP);
}

int j = 0;
float lux = 0.0;

void loop() {
  // we use here the maxWait option due fail save
  if (lightMeter.measurementReady(true)) {
    lux = lightMeter.readLightLevel();
    Serial.print(F("Light: "));
    Serial.print(lux);
    Serial.println(F(" lx"));

    if (lux < 0) {
      Serial.println(F("Error condition detected"));
    } else {
      if (lux > 40000.0) {
        // reduce measurement time - needed in direct sun light
        if (lightMeter.setMTreg(32)) {
          Serial.println(
              F("Setting MTReg to low value for high light environment"));
        } else {
          Serial.println(
              F("Error setting MTReg to low value for high light environment"));
        }
      } else {
        if (lux > 10.0) {
          // typical light environment
          if (lightMeter.setMTreg(69)) {
            Serial.println(F(
                "Setting MTReg to default value for normal light environment"));
          } else {
            Serial.println(F("Error setting MTReg to default value for normal "
                             "light environment"));
          }
        } else {
          if (lux <= 10.0) {
            // very low light environment
            if (lightMeter.setMTreg(138)) {
              Serial.println(
                  F("Setting MTReg to high value for low light environment"));
            } else {
              Serial.println(F("Error setting MTReg to high value for low "
                               "light environment"));
            }
          }
        }
      }
    }
    Serial.println(F("--------------------------------------"));
  }

  if (j % 2 == 0) {
    canvas.fillScreen(ST77XX_BLACK);
    canvas.setCursor(0, 17);
    canvas.setTextColor(ST77XX_YELLOW);
    canvas.println("Adafruit Feather");

    canvas.setTextColor(ST77XX_RED);
    canvas.print("Red Buttons: ");
    if (digitalRead(5)) {
      canvas.print("- UP");
    }
    else
    {
      canvas.print("- DOWN");
    }
    canvas.println("");

    canvas.setTextColor(ST77XX_BLUE);
    canvas.print("Blue Buttons: ");
    if (digitalRead(6)) {
      canvas.print("- UP");
    }
    else
    {
      canvas.print("- DOWN");
    }
    canvas.println("");

    canvas.setTextColor(ST77XX_WHITE);
    canvas.print("Lux: ");
    canvas.println(lux, 2);

    display.drawRGBBitmap(0, 0, canvas.getBuffer(), 240, 135);
    pinMode(TFT_BACKLITE, OUTPUT);
    digitalWrite(TFT_BACKLITE, HIGH);
  }

  delay(10);
  return;
}
运行效果
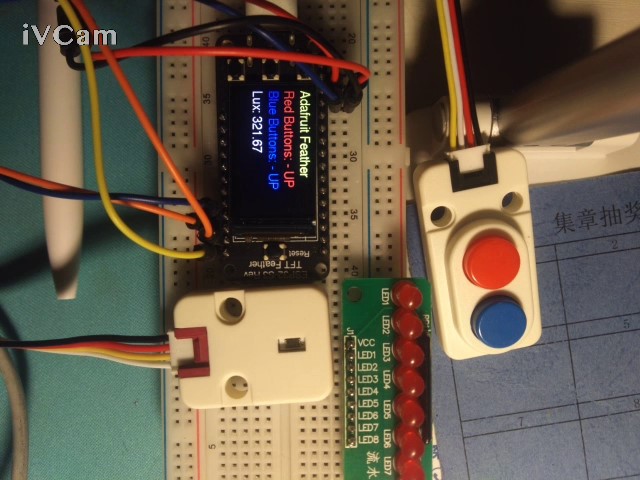
至此三个任务均已完成

 我要赚赏金
我要赚赏金

